Tutorials: missio™: Campaign Management
Required Access: Voxtelesys Portal
Disclaimer: To create a missio™ Campaign, you need to have Flows created beforehand. Please refer to our Canvas Tutorials to learn more about the Flow creation process.
Table of Contents:
- Navigate to the Voxtelesys Portal
- Create Campaign
- Campaign Information
- Prepare Your CSV File
- List Upload
- List Mapping and Validation
- Schedule and Test- Test Your Campaign
- Schedule and Test- Schedule Your Campaign
- Review & Submit
- Campaign Management Table
- Viewing Campaign Details in the Campaign Management Table
Last Updated: 11/17/2025
Log in to the Voxtelesys Portal
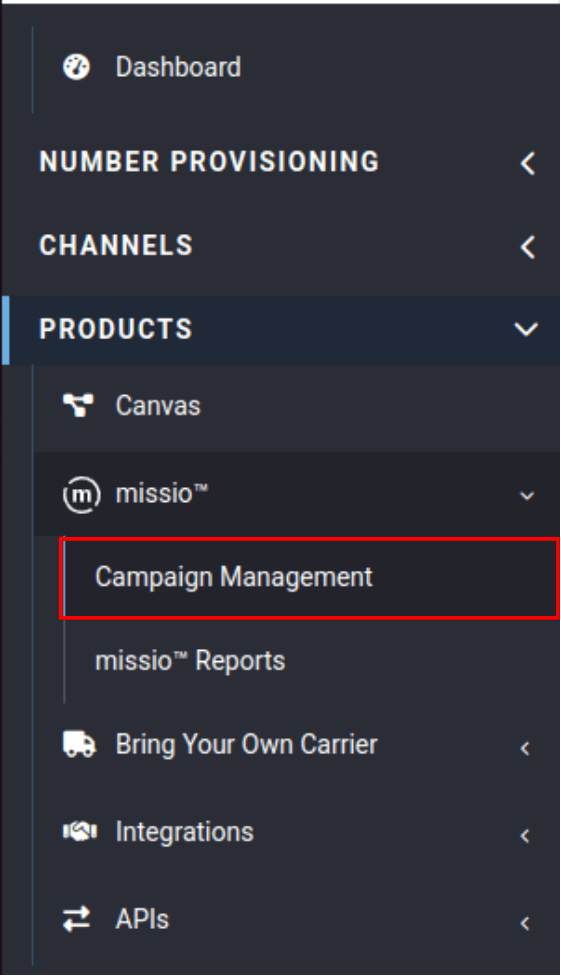
Navigate to "Campaign Management" which is located under the "missio™" drop-down in the "Products" category.

Click "+Create Campaign"
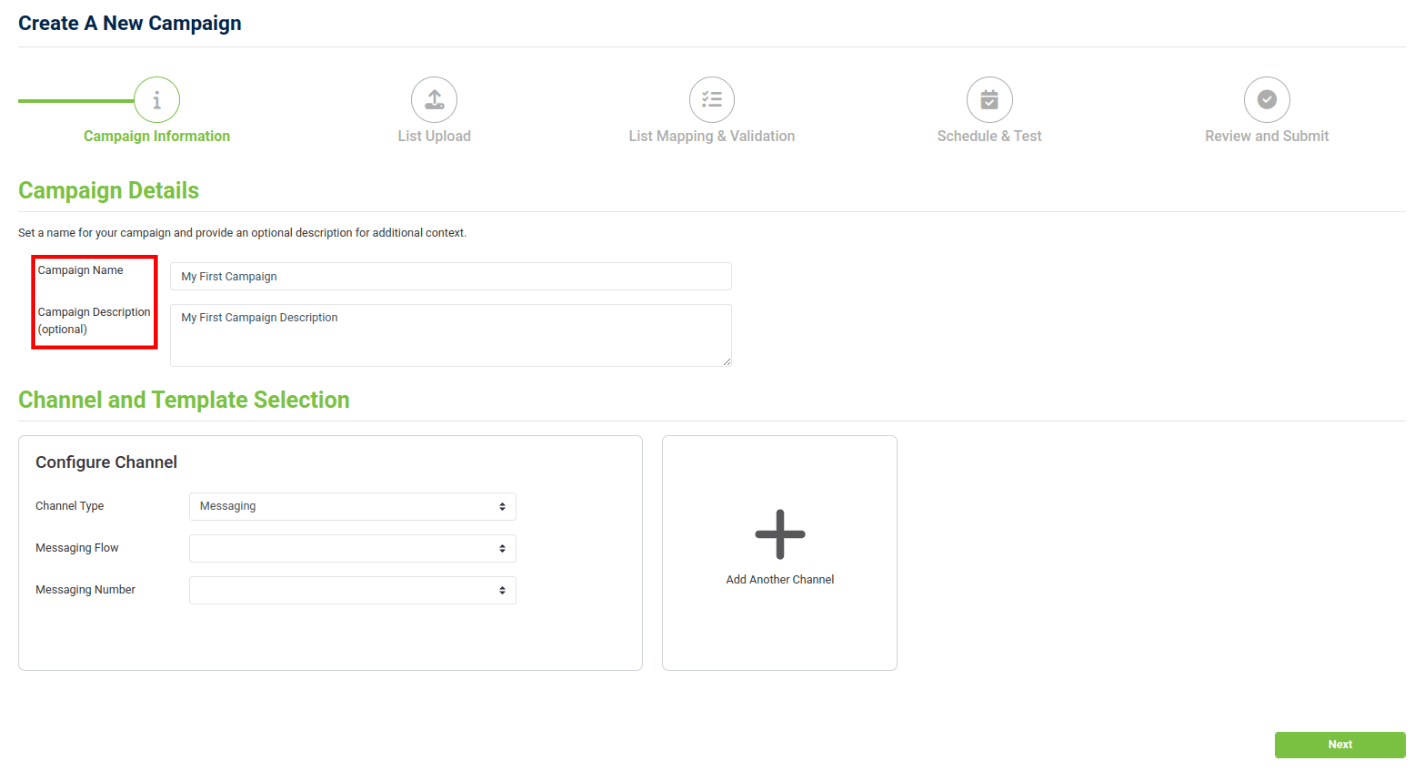
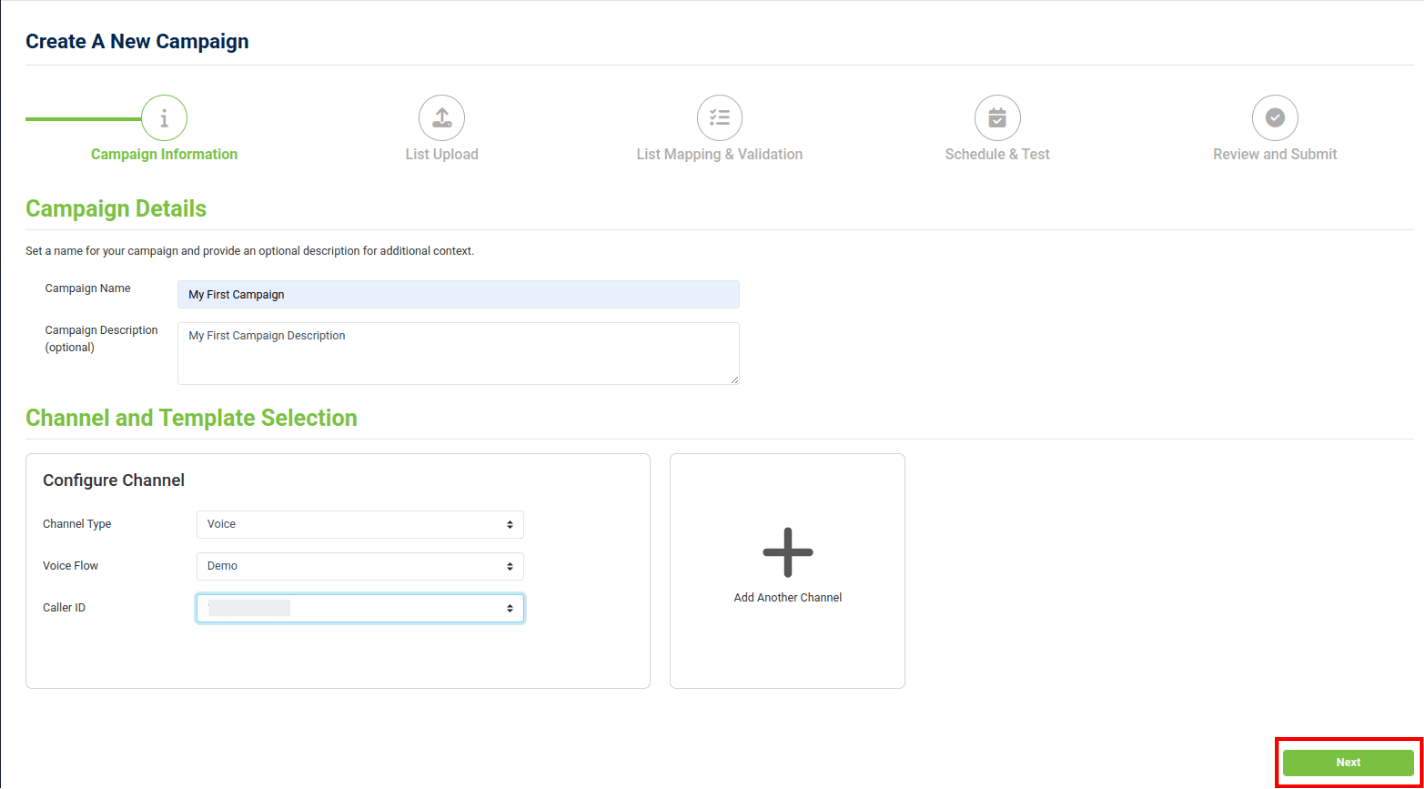
Campaign Details
Under Campaign Details, enter your Campaign Name and Campaign Description (Optional).
Channel and Template Selection
Under "Channel and Template Selection" select the following:
- Channel Type: Messaging, Voice, or Email.
- Flow: Desired Flow to associate with the channel.
- Number or Username: The desired phone number or email username to asscoiate with the Flow.
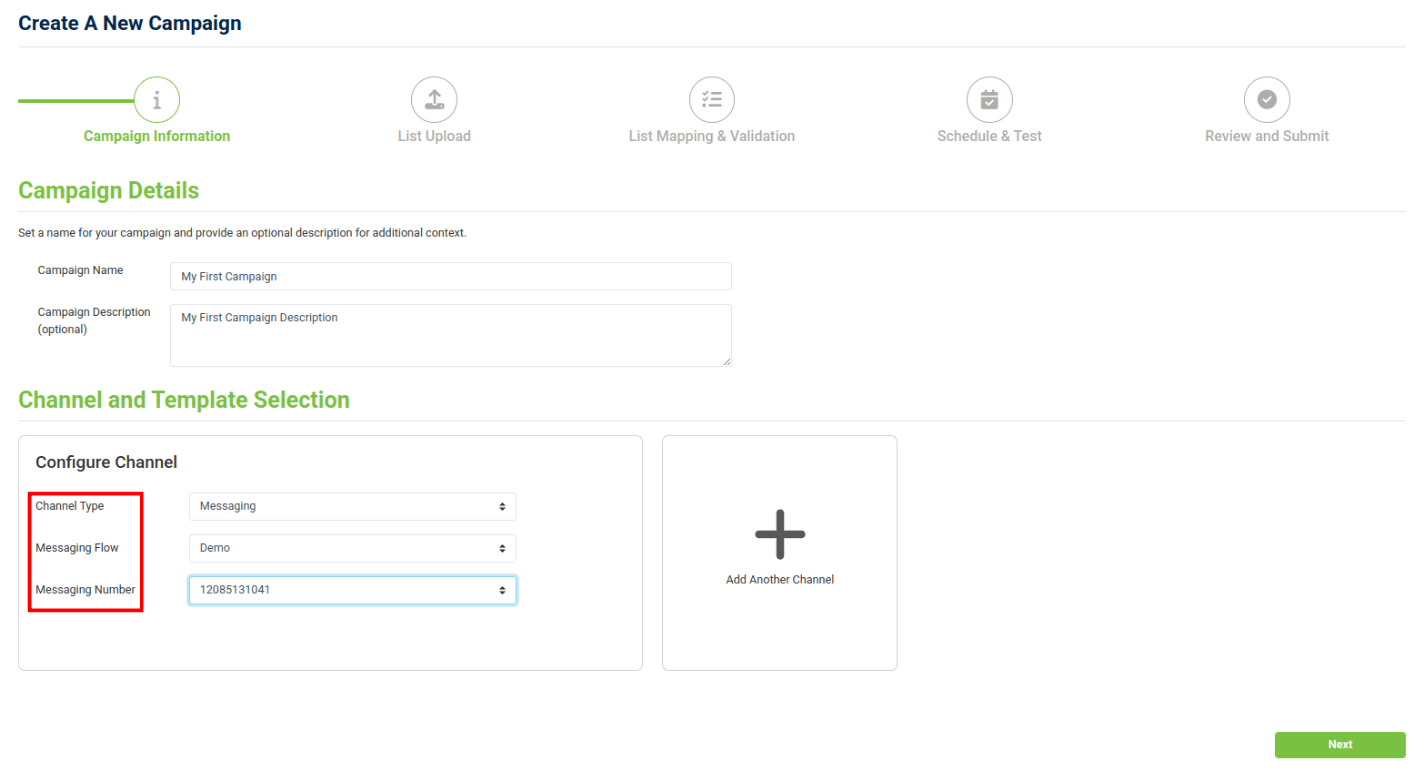
Channel and Template Selection
Click "Add Another Channel" to include additional channels.
You can add up to 3 Channels, one for Messaging, one for Voice, and one for Email.

The "From Email Username" field is only the username, not the full email address. The email domain is defined in the Flow’s Email widget.
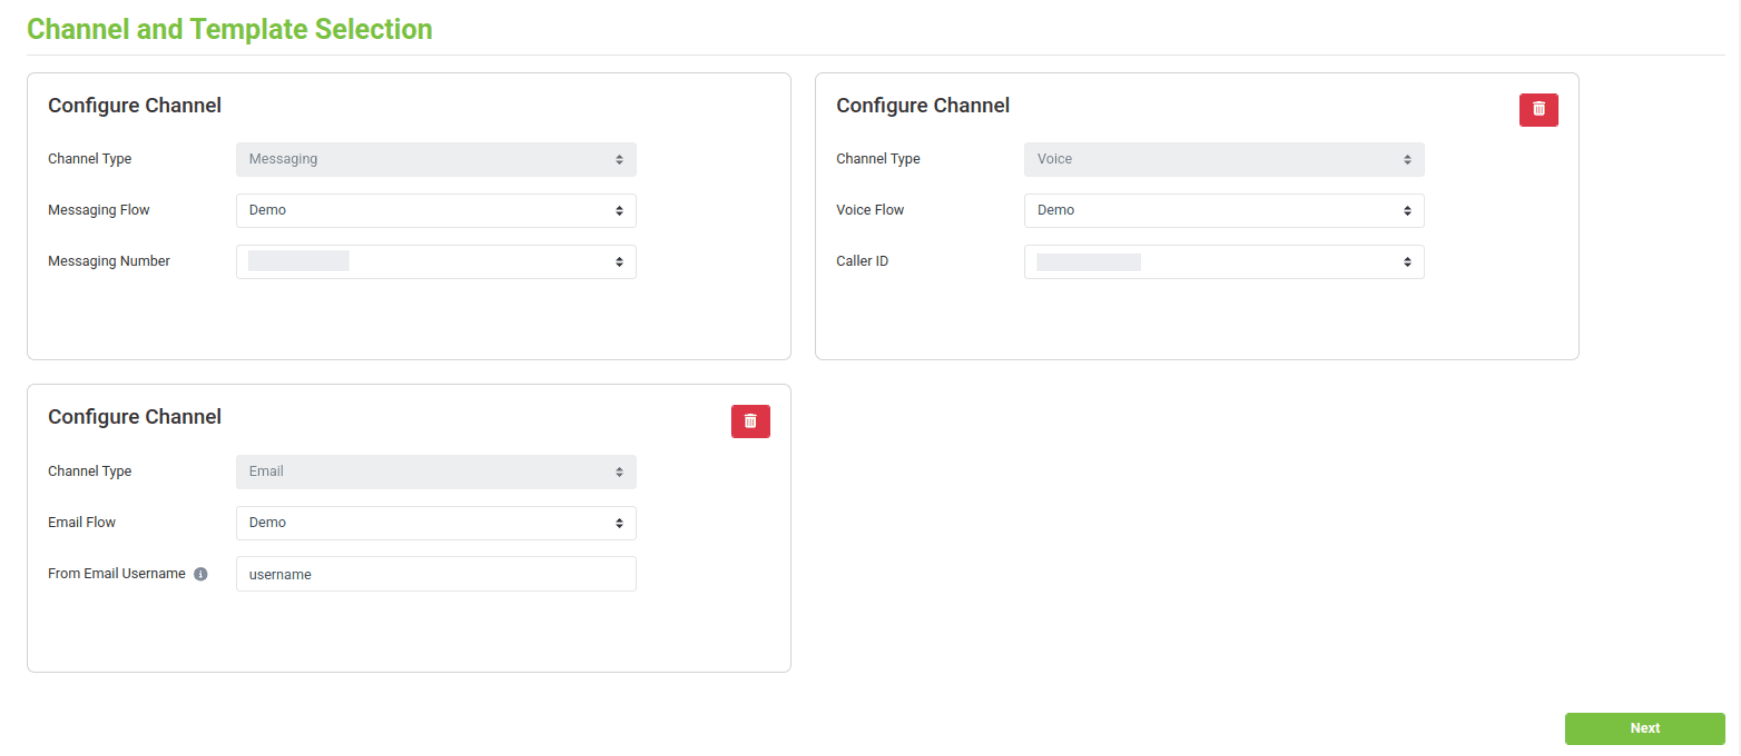
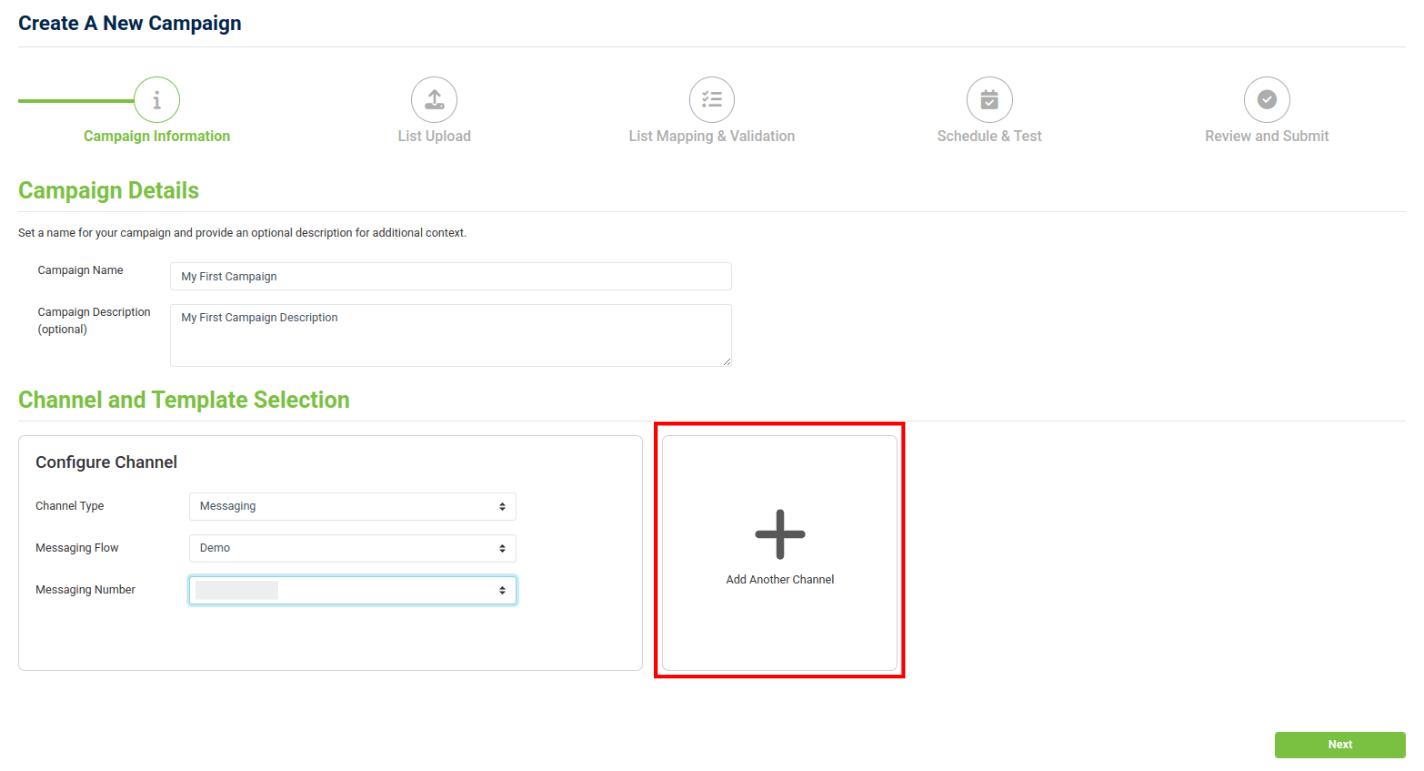
Channel and Template Selection
On the right, you’ll see an example of a Campaign configured with multiple channels:
Once all desired channels are added, click "Next" to continue.
Setting up Your CSV List for Mapping
Before uploading your list, make sure your CSV tells the system who to contact and which channel to use for each alert. You can reference the sample CSV for guidance.
Required Variables
Your CSV must include two columns:
- Recipient (mapped as "to (recipient) (Required)"):
- Either a phone number for Messaging or Voice, or an email address for Email.
- Channel (mapped as "channel_type (Required)" ):
- Must be one of the following values: Voice, Messaging, or Email.
The recipient value must match the channel. For example, in the image below, if the channel for a row is Email, then the recipient must be an email address. Similarly, if the channel is Messaging or Voice, the recipient must be a phone number.
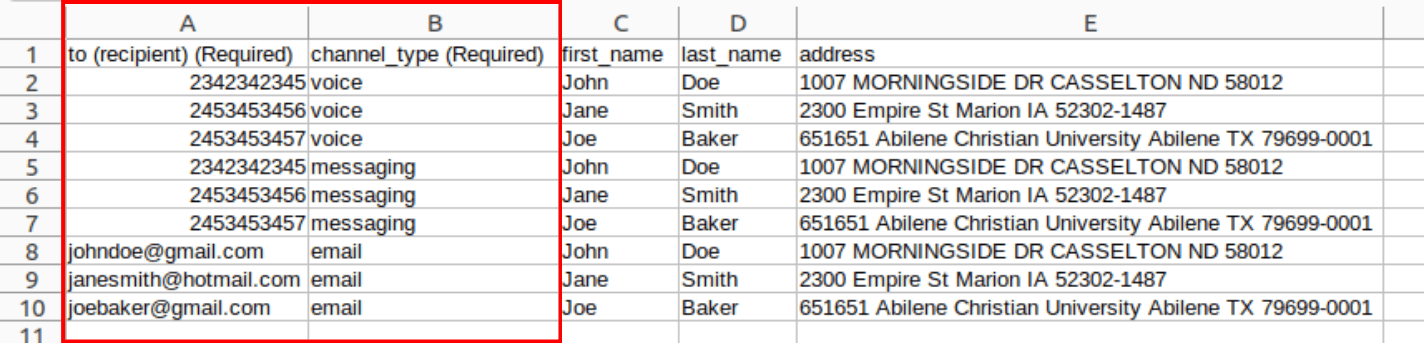
Your CSV headers do not need to be named exactly "to (recipient)" or "channel_type".
During the "List Mapping & Validation" step, you’ll choose which columns map to the recipient and channel. Just make sure the column values are valid (phone numbers, email addresses, or channel names).
Preparing Your CSV to Deliver Alerts to One Recipient via Multiple Channels
Each channel—Messaging, Voice, and Email—requires its own row in the CSV.
If a contact should receive messages on multiple channels, then create one row per channel and use the same person’s info with a different channel each time.
For example, in the image below, John Doe appears three times: once for Voice, once for Messaging, and once for Email. This ensures the Campaign sends alerts on all selected channels.
Refer to the image below for the CSV layout:

Using the Recipient in Your Flow
To reference the recipient inside your Flow use:
contact.channel.address
This value is automatically used by the Outbound Call and Send & Wait widgets.
Accessing Other CSV Variables
All other variables can be accessed in the Flow using this format: {{flow.parameters.<variableName>}}
For example, if you set a variable in your Flow as {{flow.parameters.firstName}} then you would map the column to firstname.
Only Flow parameters and variables from the selected email template are available in the Flow. Flow parameters are formatted like so: {{flow.parameters.<value>}}
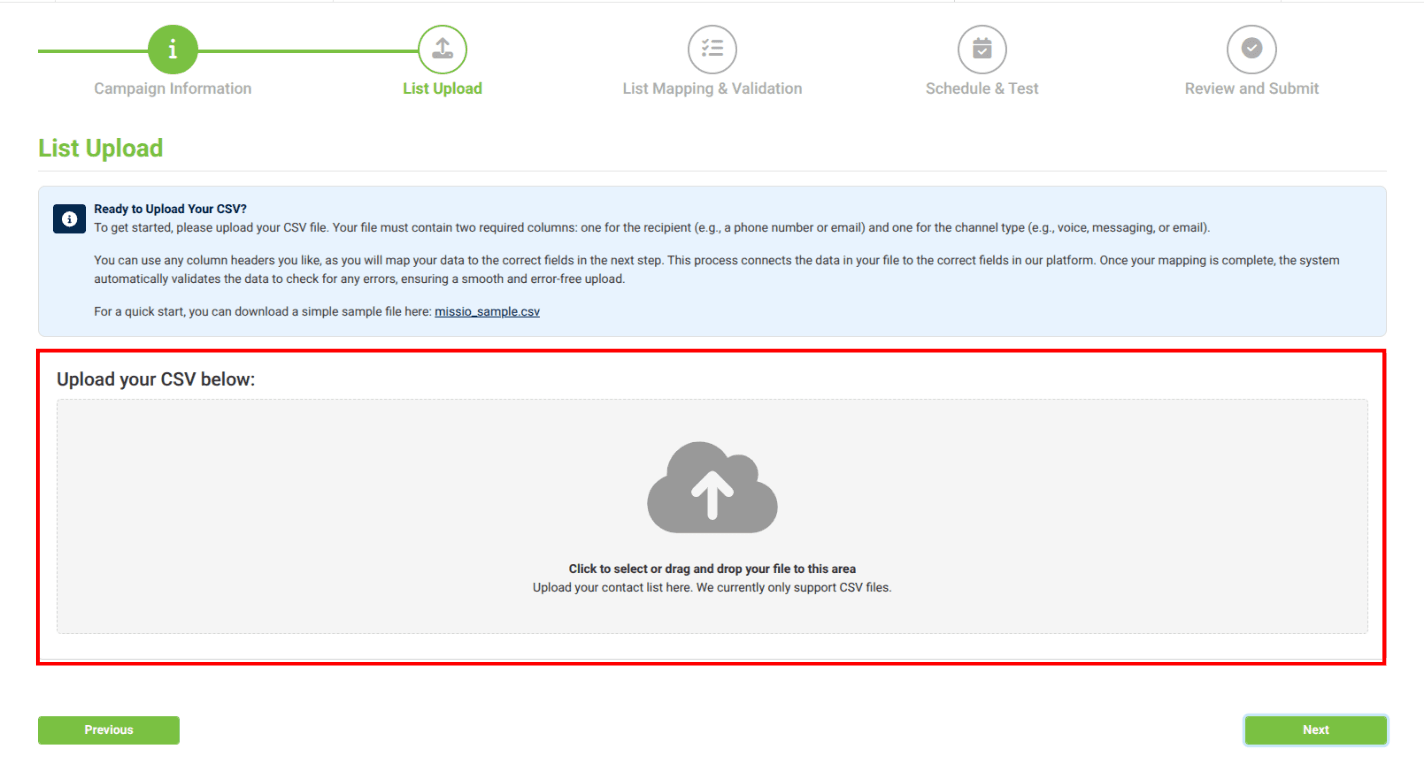
List Upload
Upload your prepared CSV file to continue.
Required Fields: Your CSV must include a column for recipeint and a column for channel.
File Upload Guidelines:
- Only CSV files are supported
- Maximum file size is 5MB. Your selected trunk group may enforce a smaller limit.
- All data must use only ascii characters only.
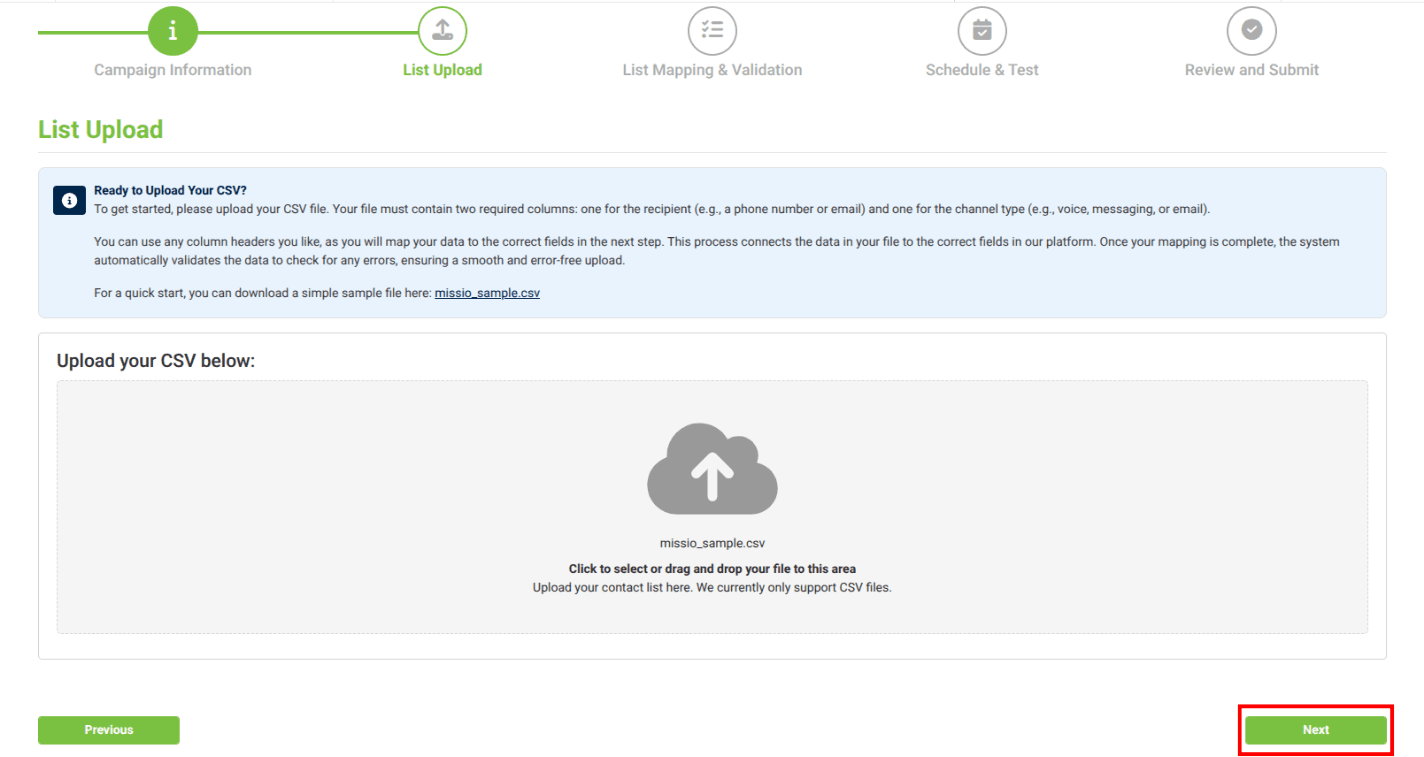
List Upload
Once your file is uploaded successfully, click "Next" to continue.
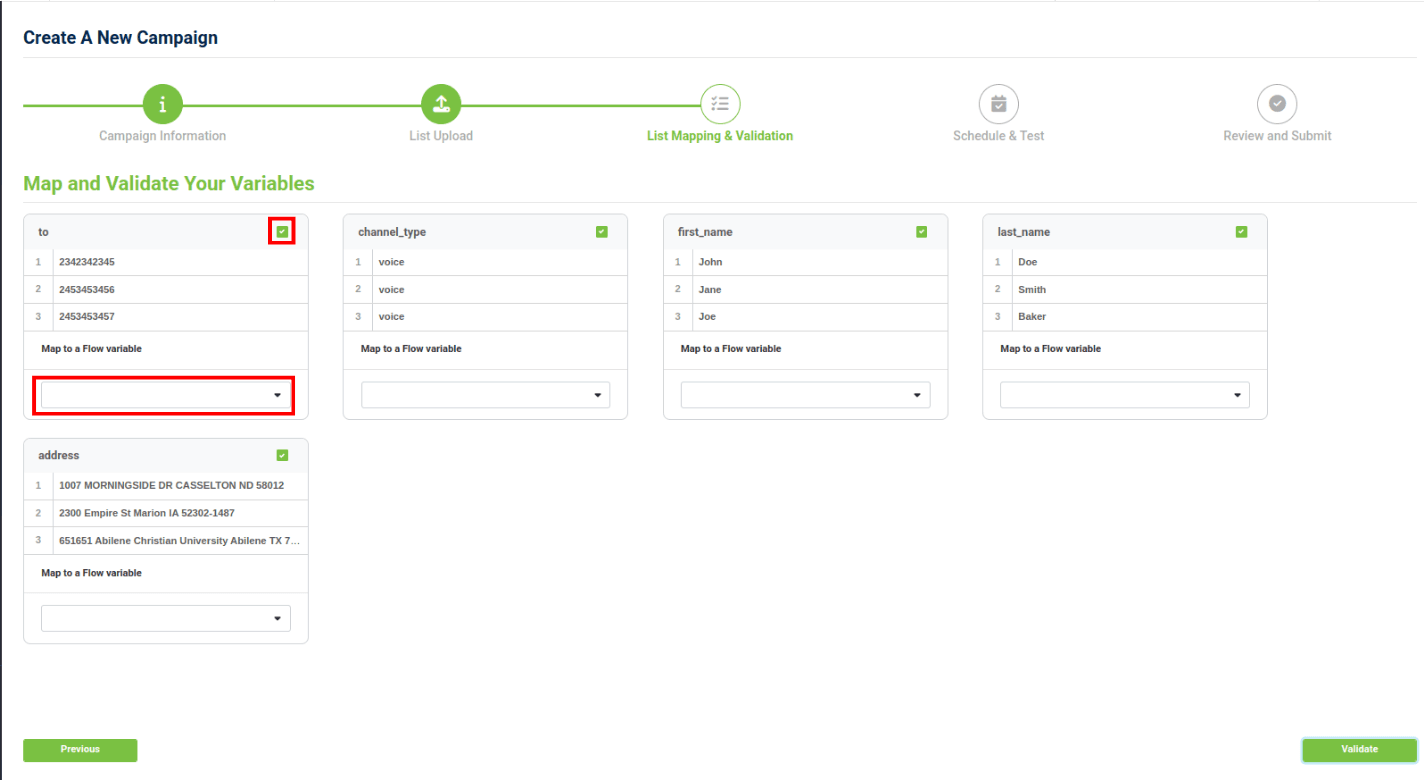
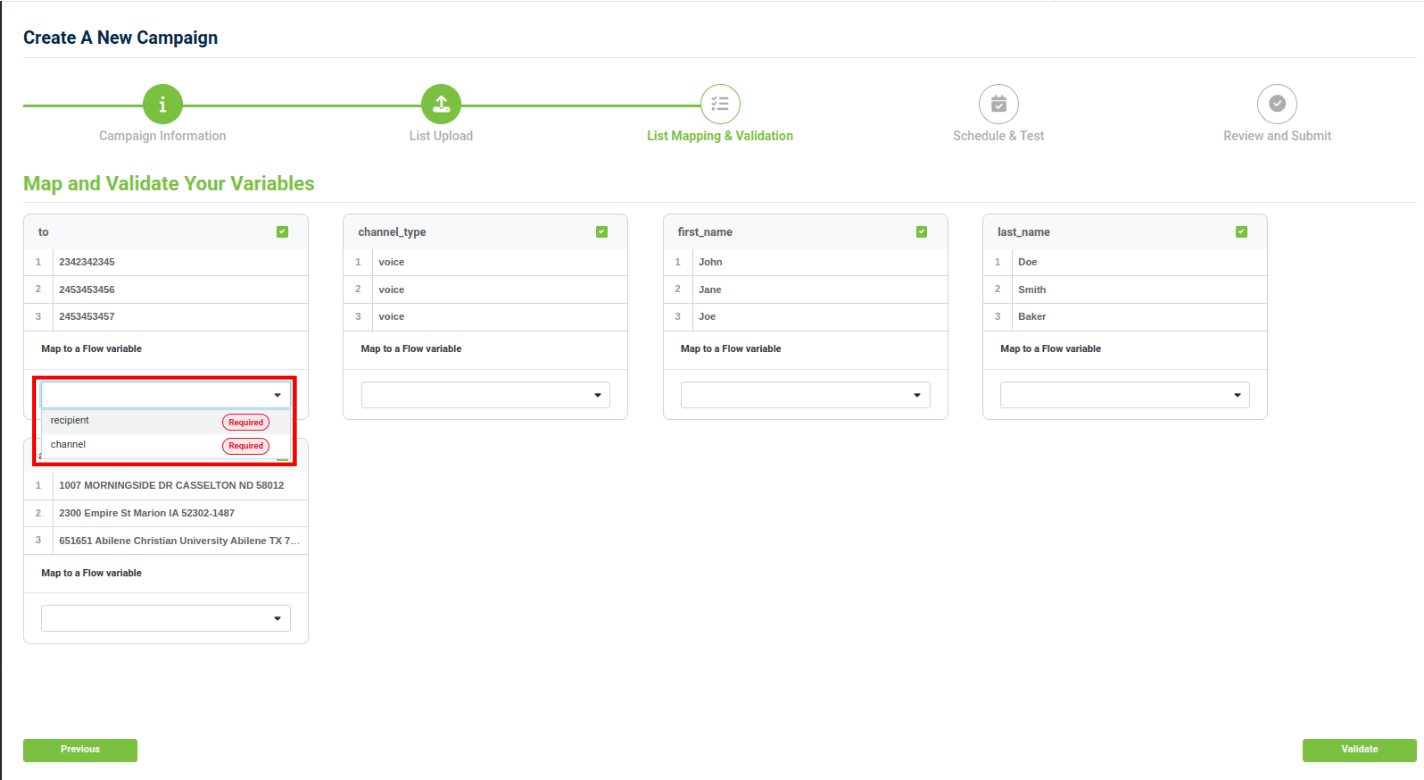
Map and Validate Your Variables
In the "List Mapping & Validation" step, you’ll choose which CSV columns are sent into your Flow.
Each uploaded column appears with a checkbox, uncheck a column to exclude it.
Use the “Map to a Flow Variable” dropdown to assign each column to a Flow variable.
Map and Validate Your Variables
Two variables must be mapped:
- Recipient: Must be a phone number (Messaging or Voice) or an email address (Email).
- Channel: must be either “Voice,” “Messaging,” or “Email”.
Only variables that are mapped during this step will be sent to the Flow.
For more details on channel and recipient refer back to Prepare Your CSV File. If you need further help, please open a Support Ticket in the Voxtelesys Portal.
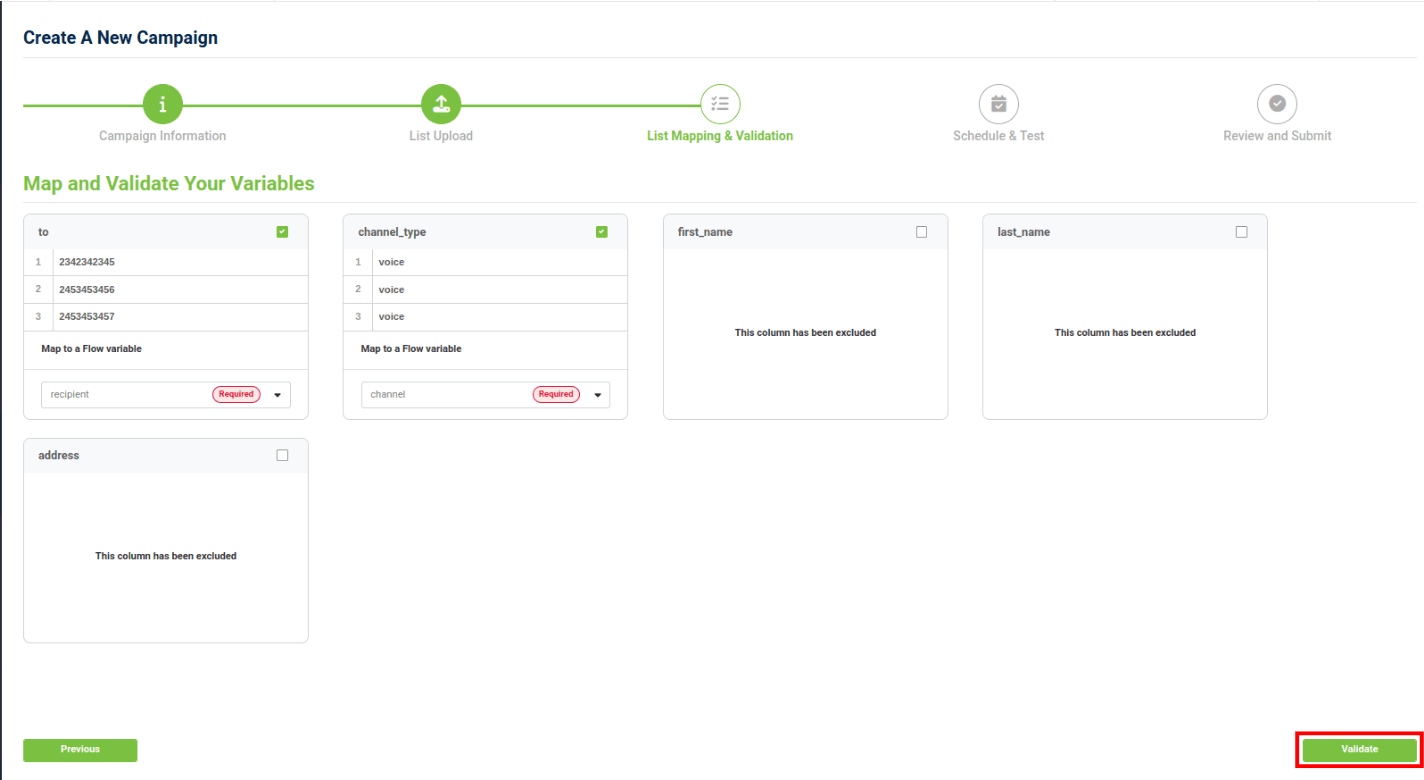
Map and Validate Your Variables
Once you have:
- Mapped all required variables.
- Mapped any additional variables you need.
- Excluded unnecessary columns.
Click "Validate" to continue.
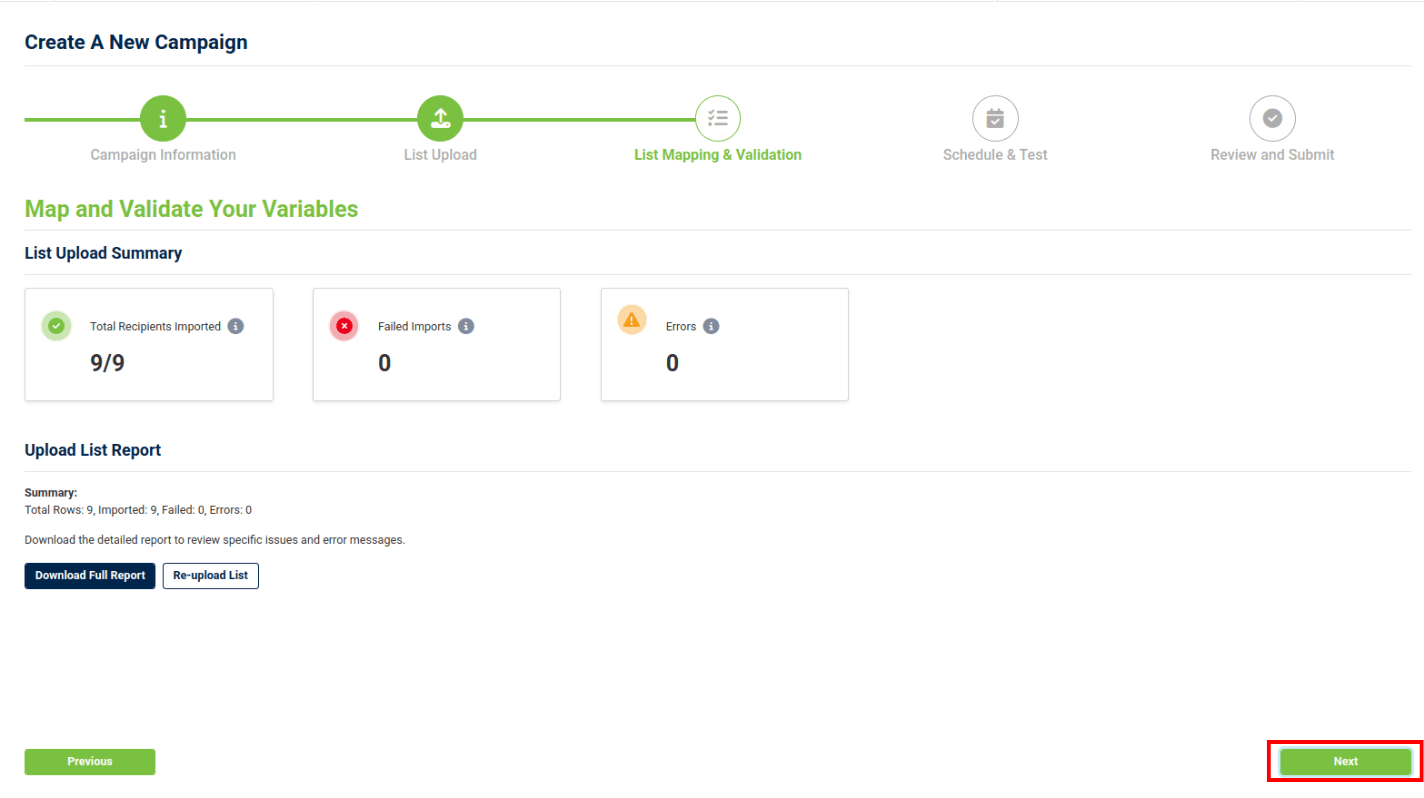
List Upload Summary
After clicking "Validate" you will see a summary of your upload:
- Total Recipients Imported: The total number of recipients imported successfully.
- Failed Imports: The total number of recipients that failed to be imported.
- Errors: The total number of recipients that had errors during import.
If you re-upload your list, you’ll need to complete validation again. You can download a detailed report under "Upload List Report".
You may continue with your Campaign even if some rows fail validation. Only rows that pass validation will be sent.
Once completed, click "Next".
Testing Your Campaign Overview
Testing your Campaign is optional, but it helps you confirm everything is working as expected before sending it live.
When you click "Define Variables", a modal opens where you can set test values. After you click "Send Test", those values are passed into your Flow and the test is sent to the email address (for email tests) or phone number (for SMS or voice tests) you enter.
In this section, we’ll cover:
- How to send a test without variables
- How to send a test with variables
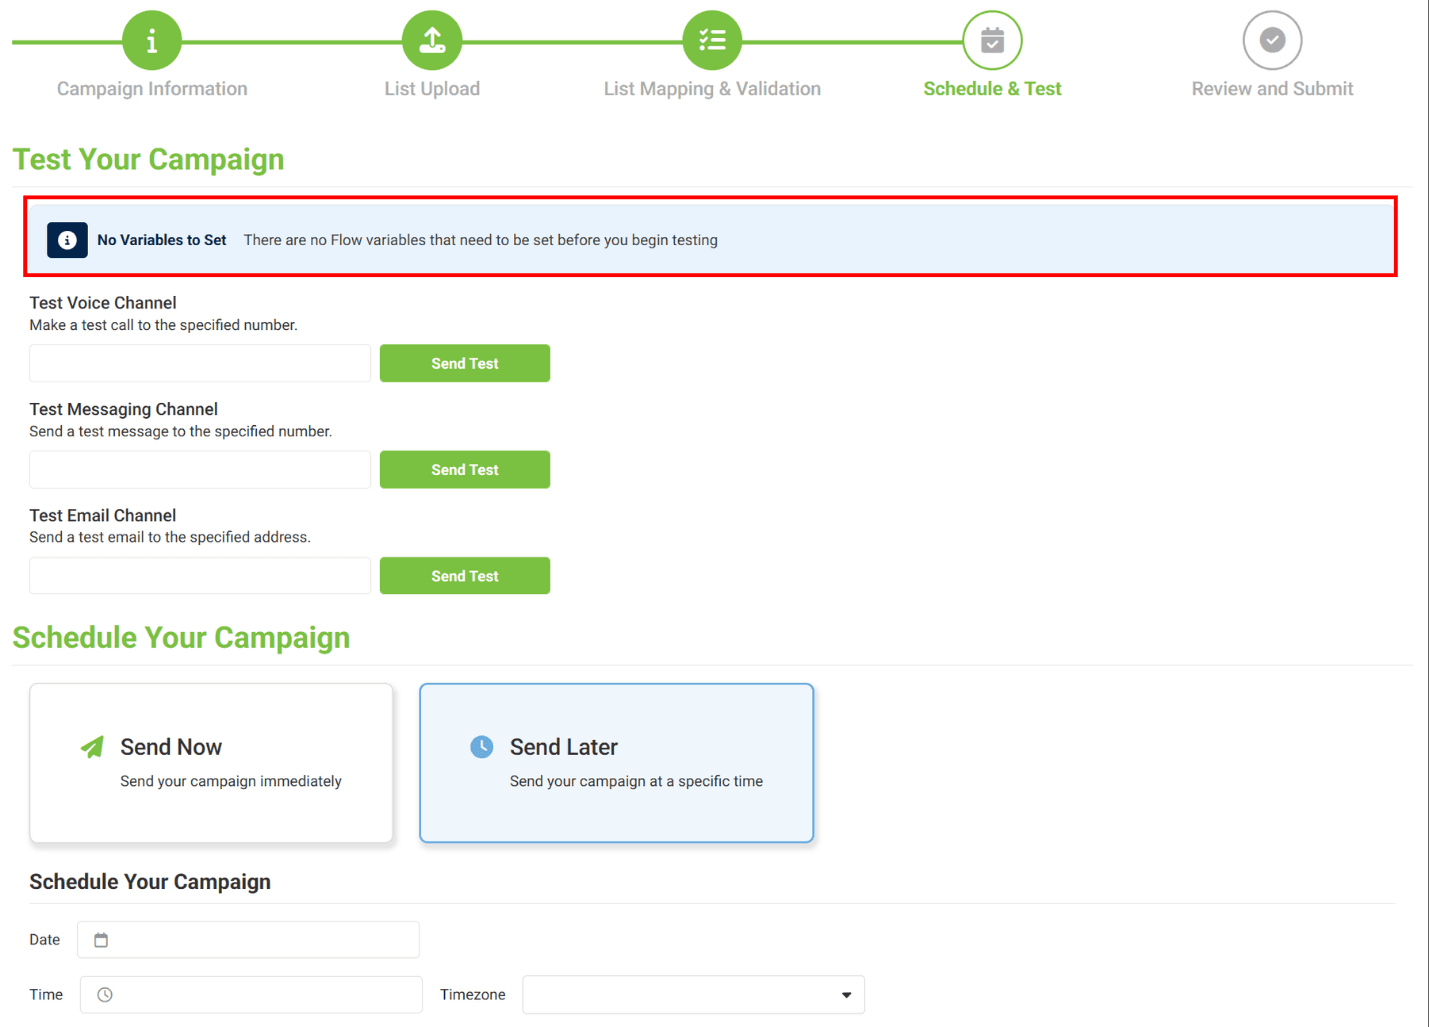
Testing Without Variables
If your Campaign only uses the "recipient" and "channel" fields, there are no variables to set.
In this case, you will see a message that says “No Variables to Set”. You can proceed directly to sending a test.
Tests run your Flow just like a real Campaign. Standard charges apply for Voice, Messaging, and Email usage. missio™ does not add any extra testing fees—it simply executes the Flow using the test details you provide.
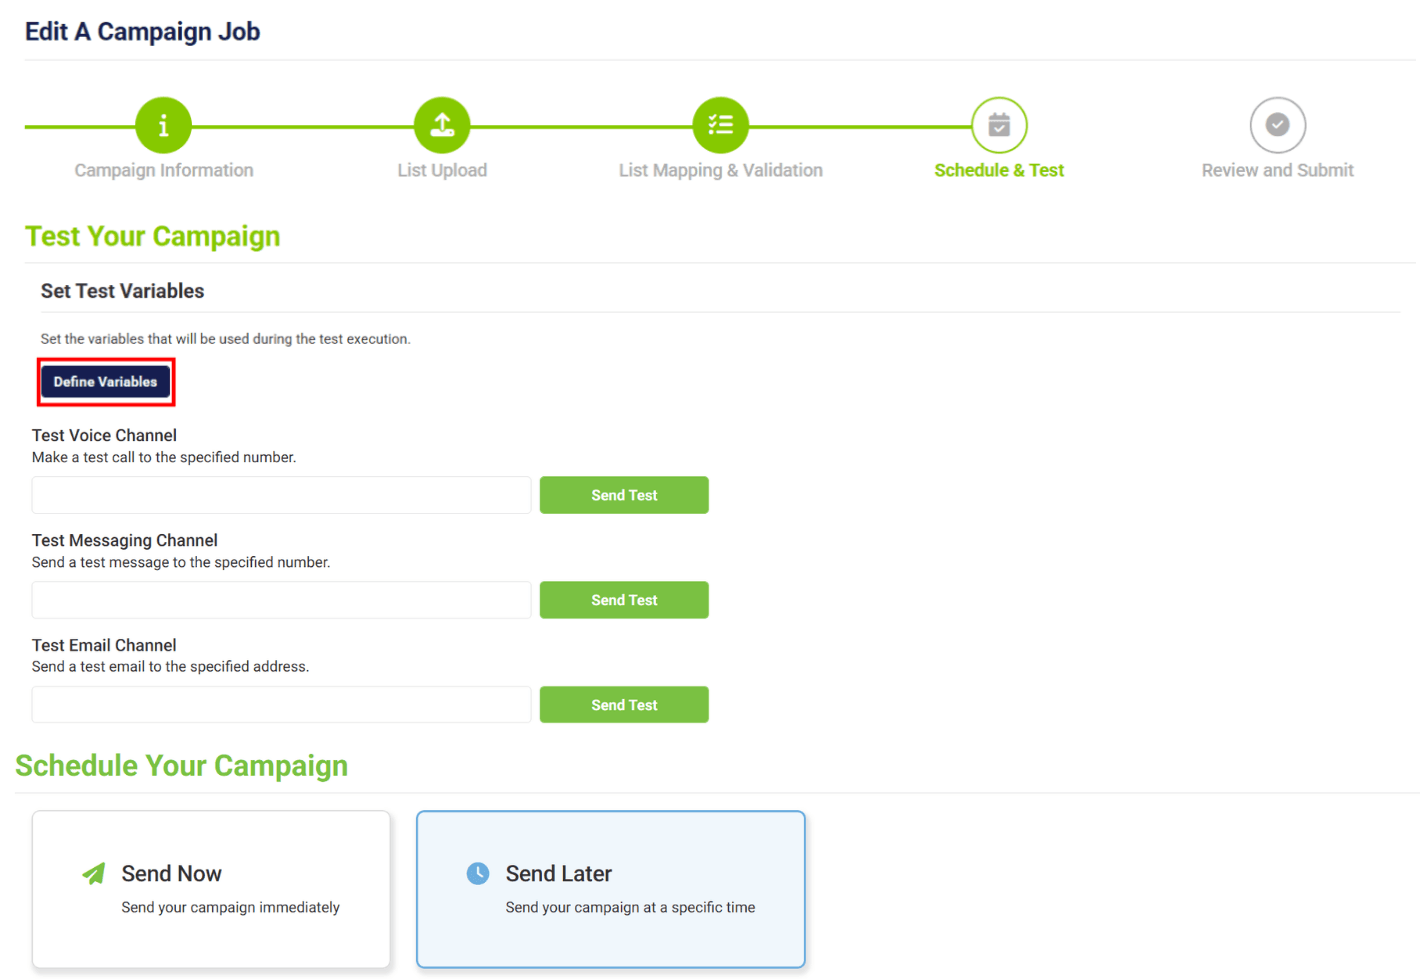
Testing With Variables
If your Campaign includes variables, you must define them before sending a test.
First, click "Define Variables".
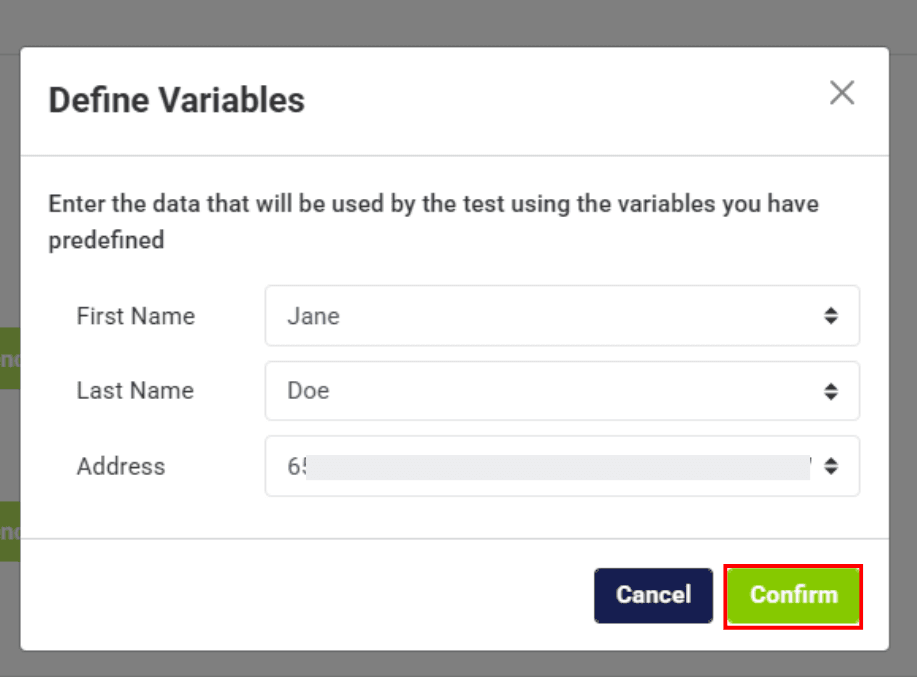
Testing With Variables
Next, enter test values for the variables created during the CSV upload and column mapping step.
Once completed, click "Confirm" to continue.
You do not need to map the channel field—each channel is tested separately.
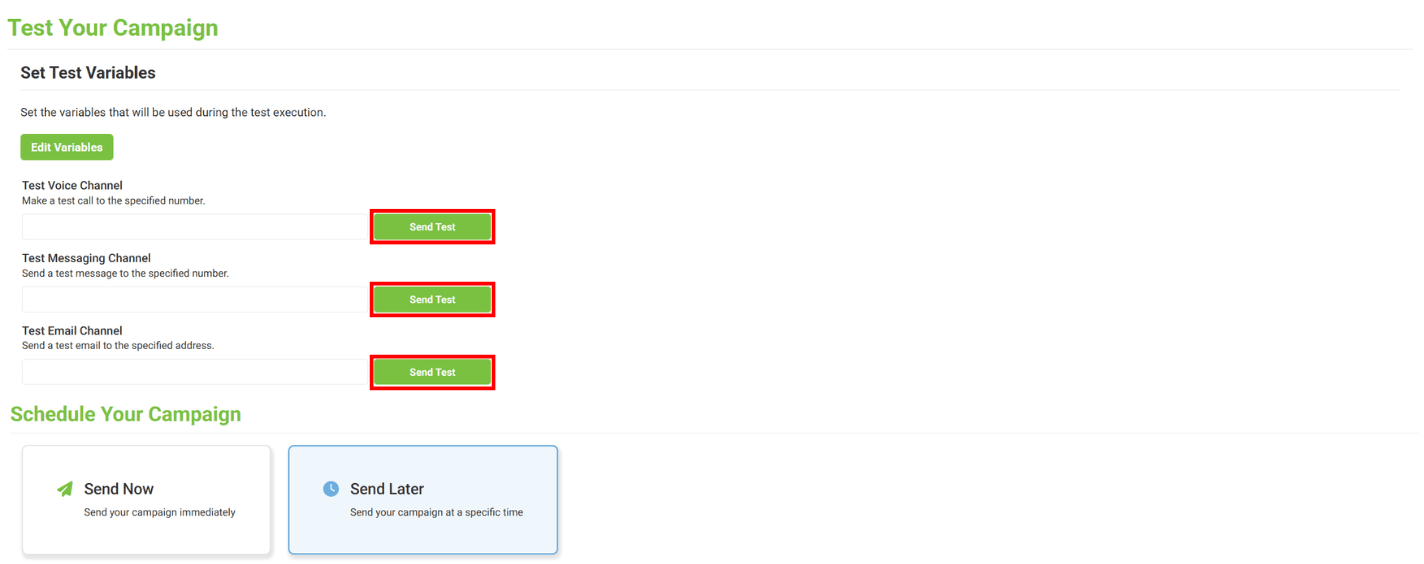
Sending a Test
Once your variables are defined (or if there are no variables to set), you’re ready to send a test.
If multiple channels are configured (Voice, Messaging, and Email):
- Enter a phone number or email address for the channel you want to test.
- Click "Send Test".
Your test will run using the values and contact details you provided.

Schedule Your Campaign
Choose to send your Campaign immediately or schedule to send your Campaign later.
If you choose to "Send Later" then fill out the fields in the "Schedule Your Campaign" section.
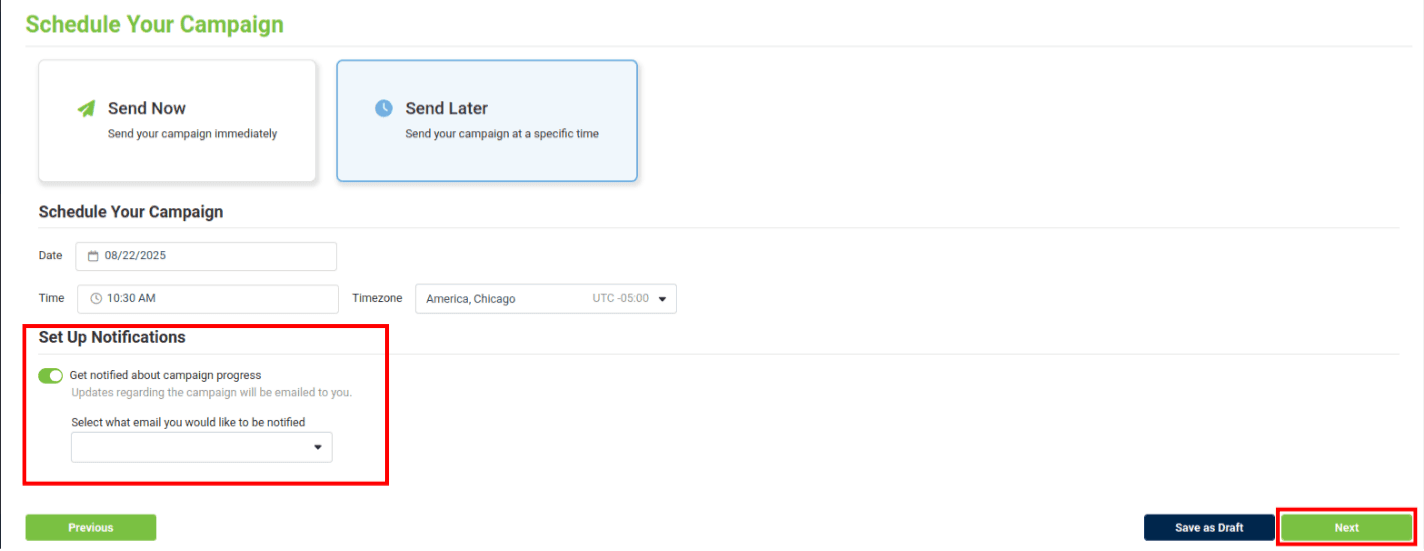
Set Up Notifications
If you would like to be notified about Campaign progress, enable "Set Up Notifications". Updates regarding the Campaign will be emailed to you.
Only users that have the manage/view campaigns permission may be selected to receive updates about Campaign progress.
Click "Next".
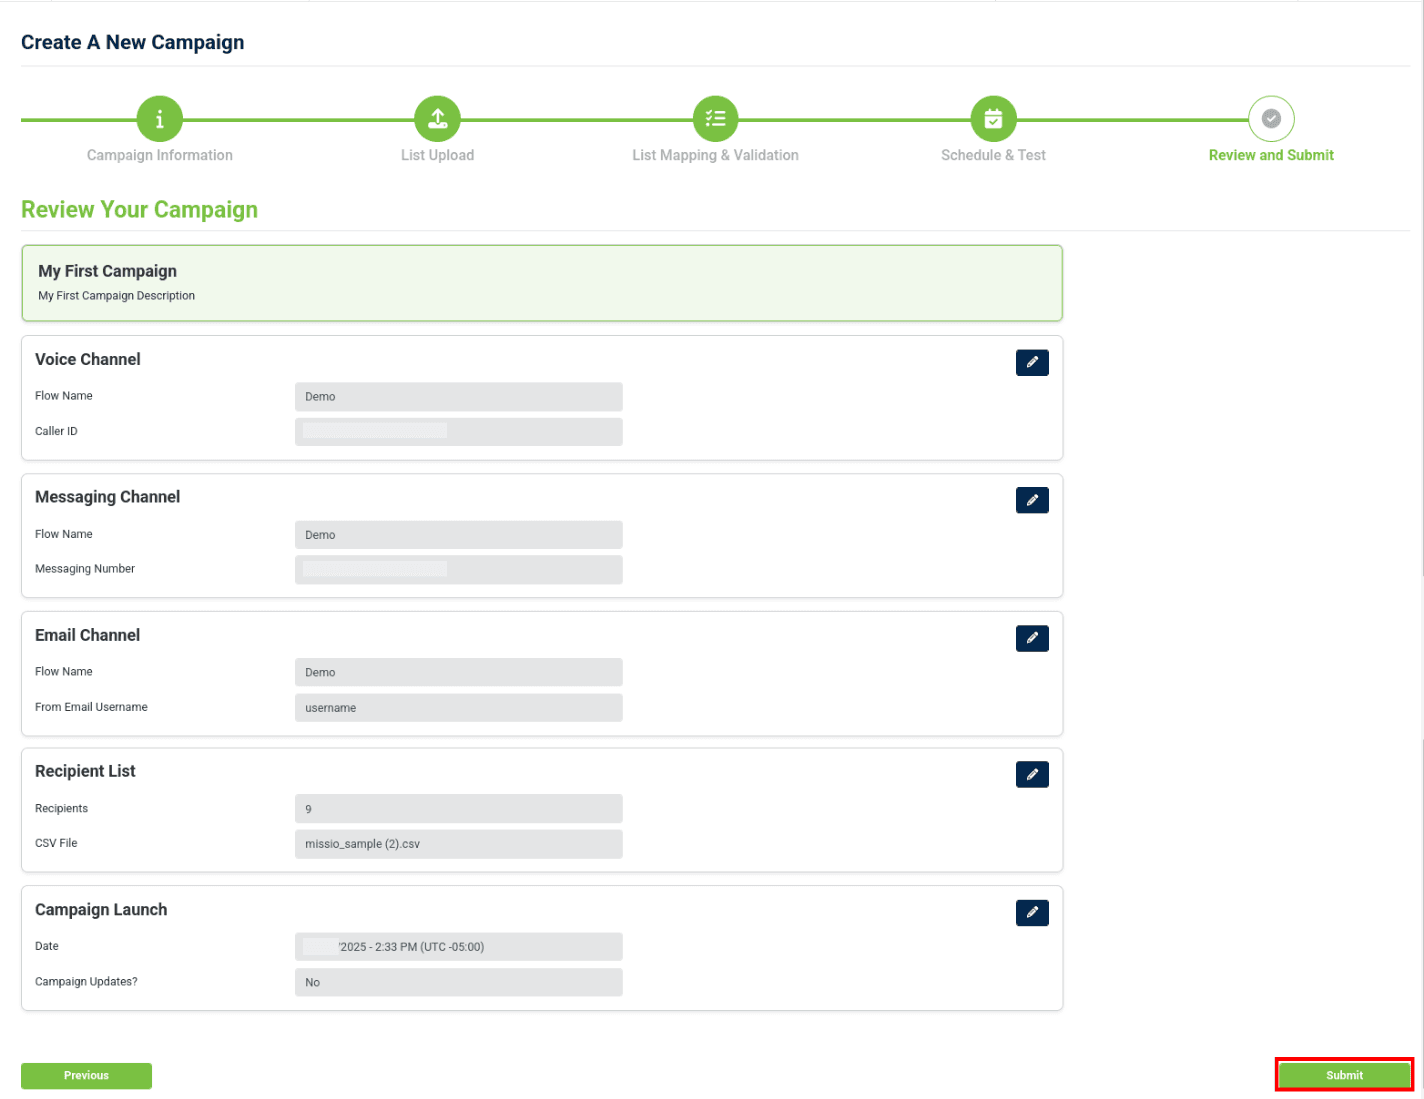
Review Your Campaign
Review your Campaign and click "Submit".
To edit a section just click the edit button.
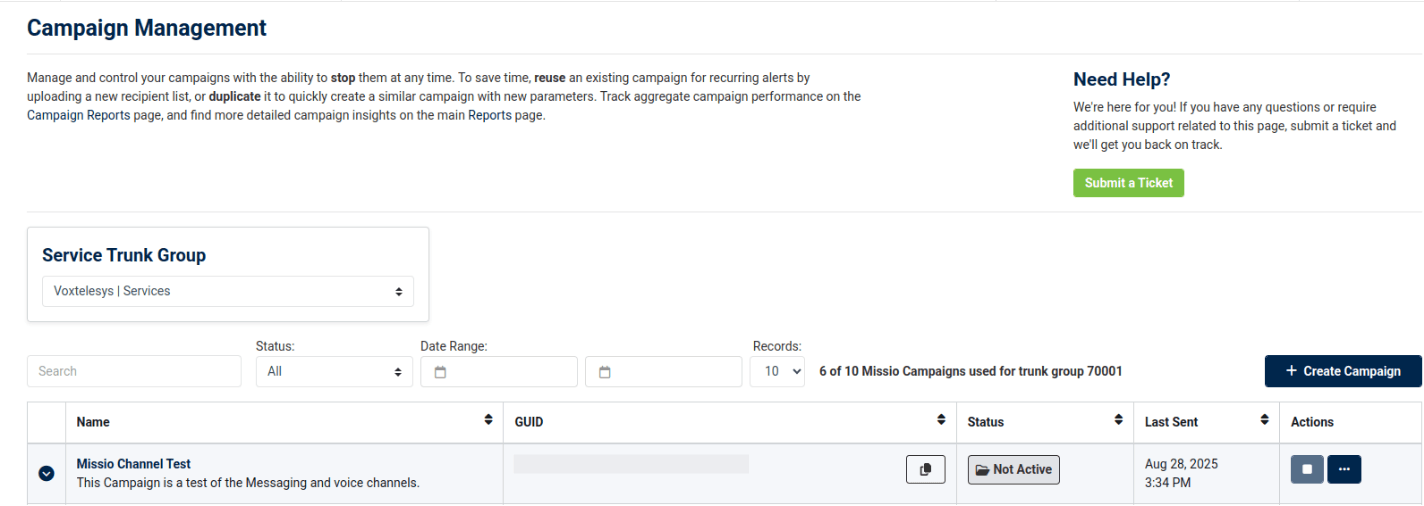
Name: Name of the Campaign.
Status (Active, Not Active, Completed):
- Active: Jobs are either in progress or scheduled.
- Not Active: At least one Job is a draft.
- Completed: all Jobs have reached a final status (failed/completed).
GUID: The Campaign's unique ID.
Actions: Stop Campaign, Edit Name & Description, Send a New Job, Duplicate Campaign, Delete Campaign.
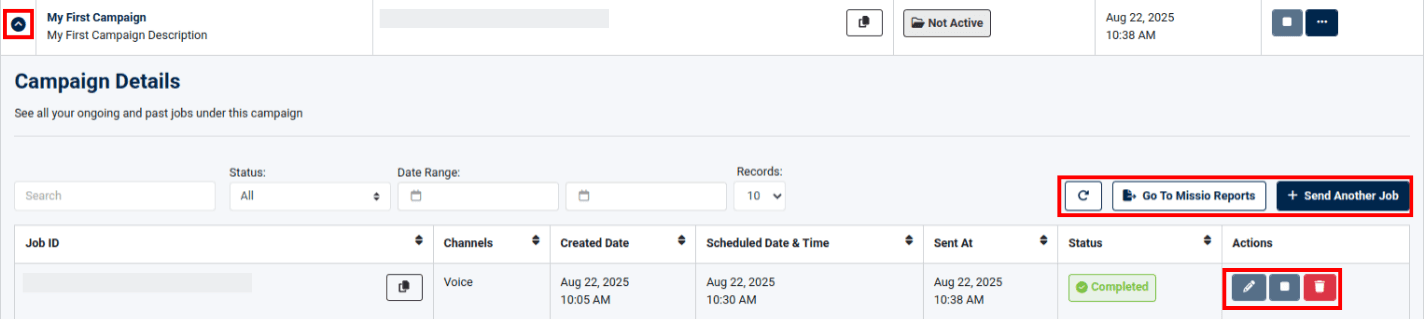
Campaign Details
To view Campaign Details open your Campaign's drop-down in the Campaign Management Table. Under Campaign Details, you can view Job ID, Channels, Created Date, Scheduled Date & Times, Sent At, Status, and Actions.
Actions under Campaign Details:
- Edit: Edit details of your Campaign.
- Stop Job: Stopping a job permanently ends the Job that is currently in progress, it cannot be unpaused.
- Delete: Permanently delete a Job.
Statuses under Campaign Details:
- Draft: Jobs that are in progress but not yet submitted.
- In Progress: Jobs that are currently being executed.
- Completed: Jobs that have been successfully executed.
- Failed: Jobs that encountered errors during execution.
- Stopped: Jobs that were stopped
- Scheduled: Jobs that are scheduled to be executed.
Addtional options under Campaign Details:
- Refresh Your Campaign
- Go to missio™ Reports
- Send Another Job.
Click the refresh button to see if a Job's status has updated.
Take a look at our other tutorials to learn more about missio™:
Reporting
General missio™ Canvas Tutorials
- missio™ Canvas Basics
- Create a New Flow
- Edit an Existing Flow
- Publish a Flow
- General Widget Overview
- Assign a Flow to a Trunk
- Assign a Flow to a Number
- Manage Your Flow Versions
Widgets
Voice
- Answer Call
- Collect Input
- Connect Call
- Hang Up Call
- Pause Call
- Record Voicemail
- Say/Play
- Collect Payment
- Make Outbound Call
Messaging
Tools
Control


