Tutorials: How to Set Up Fax-to-Email
Required Access: Voxtelesys Portal
Table of Contents:
- Navigate to Fax Profiles
- Create your Fax Profile
- Number Mapping Profile
- Add Allowed Emails
- Inbound Routing
- Assign Fax Numbers
- Send a Test Fax
- Fax Recived
Last Updated: 8/10/2025
Go to the Voxtelesys Portal.
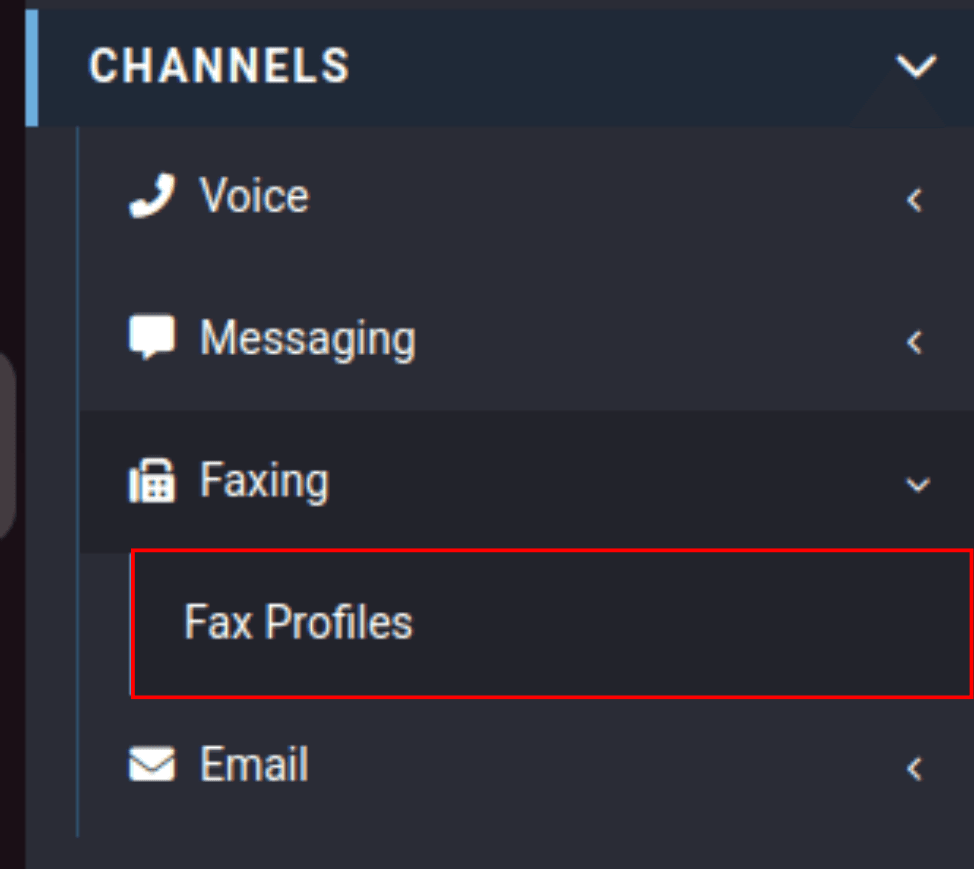
In the "Channels" category select "Faxing," then click on the "Fax Profiles" tab.

Click on the plus (+) sign.

Fill out the following fields:
- Description: How you want to name your eFax profile
- Outbound Trunk Group: Select your outbound trunk group group from the drop down.
- Caller ID: Select your main fax number
- Event type: Select "Send an Email callback"
- Email Recipient(s): Enter the email(s) you want to receive Inbound faxes. Separate the emails with a comma and no space for more than 1.
Optional fields:
- Default: Check this box if it is your only profile on the default
- Attachment Password: Set a password if you would like your faxes to have a password to open.
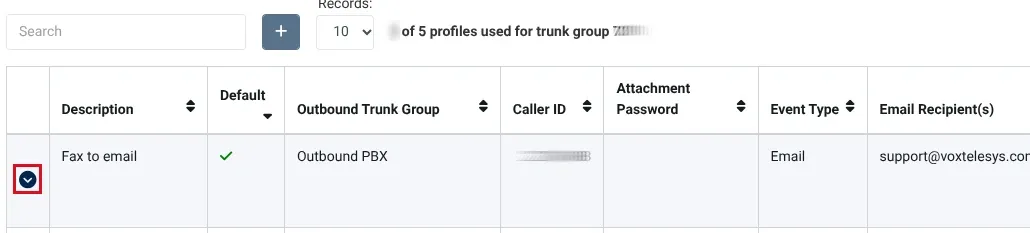
Click on the blue arrow to expand your newly created fax profile.
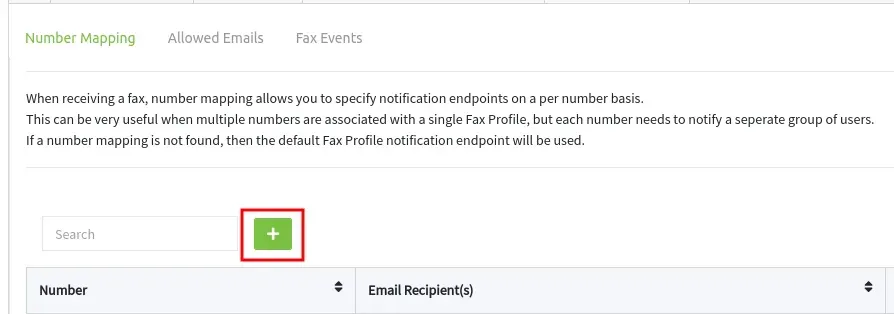
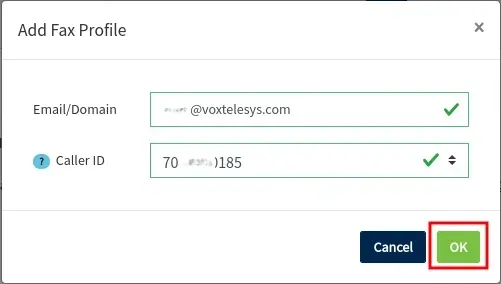
This is an optional field for if you will have multiple fax numbers to assign each of them their own inbound destination.

To the right is an example of adding one:

Read the information below the Allowed Emails tab before adding. If you need to whitelist an entire domain please create a support ticket to have our support team do this for you. We can only assign 1 outbound caller ID to the domain/email so if you have multiple outbound fax caller IDs you will not want to whitelist a domain.

This is where you can assign a caller ID and also allows specific emails to send outgoing faxes.
To the right is an example of adding an allowed email to fax out:
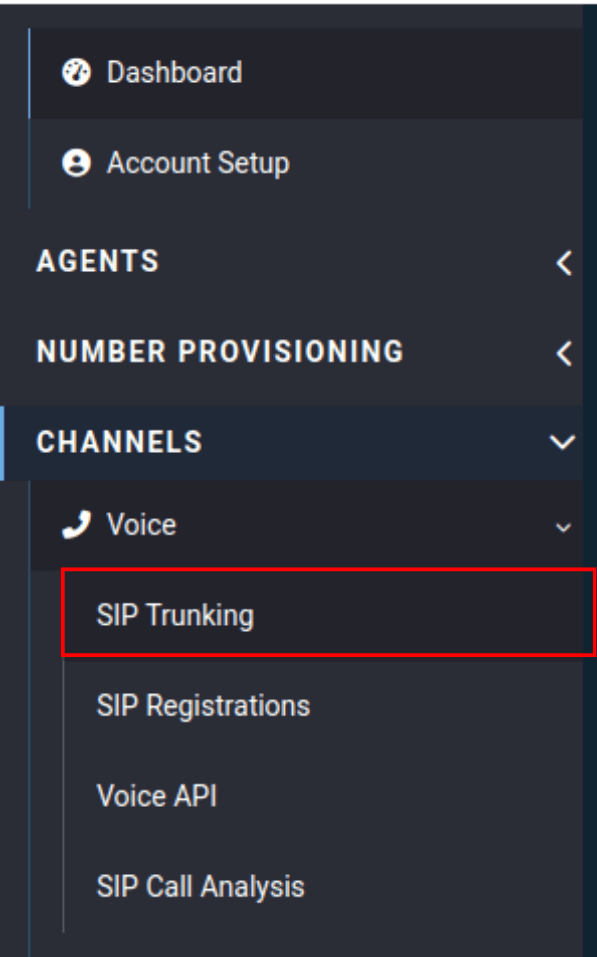
Click on the "SIP Trunks" tab.
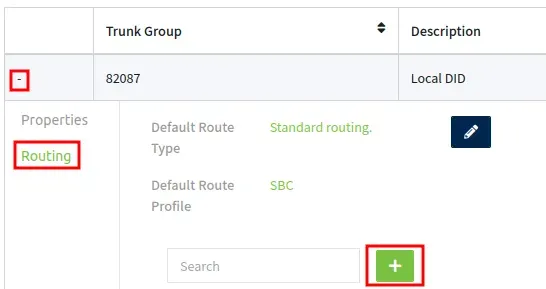
Select your Inbound Trunk Group by clicking the + in front.
Click on Routing, and click on the green plus sign:
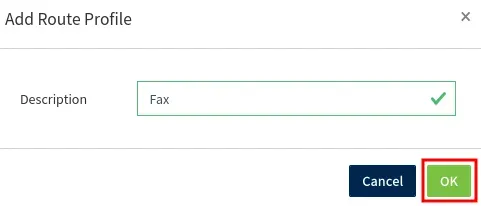
Name your route something that tells you its your eFax route in the description box of your route profile.
We used "Fax" for our example.

Expand your route profile to edit it.
Click on the edit icon under the Fax route.

Select the following:
- Destination Type: eFax
- Destination: Your fax profile
Click on "OK"

Your route will look like this:

Go to "Channels" category, select "Phone Numbers," and click on the "Numbers" tab.

Find and edit the number you want to assign the inbound route to and click the blue box with the pencil on the right hand side.

Update to the fax profile:
- Route Type: Standard Routing
- Route Profile: Fax
Save the settings by clicking on "OK"

Outbound
To send an outbound fax, email
For example, a fax to (402) 403-4435 should be sent to [email protected].

Attach your fax in one of the following formats: .pdf, .jpeg, .tiff, .png.
No more than 10 MB.

A Confirmation Email was delivered.

Received email:

Please note, If you set an attachment password you will need to use this to open the fax.


