Tutorials: SMS Setup (V20)
Required access: 3CX, Voxtelesys Portal
Last Updated: 12/17/2025

Enter your credentials.

Click on the "Admin" button in the lower left side of the screen.

Click on the "Voice & Chat" tab from the dashboard.

Click on or select the three dot icon to edit your Voxtelesys SIP Trunk.

Click on the "SMS" tab.
- Enable SMS: Check this box.
Copy the Webhook.
Go to the Voxtelesys Portal and enter your credentials.
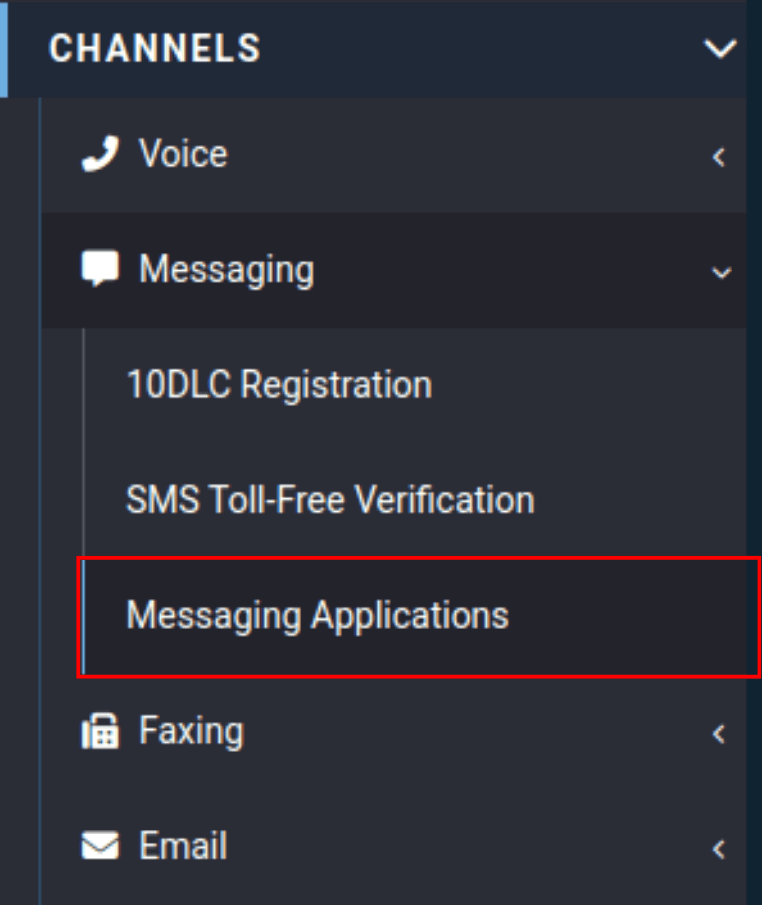
Open the "Channels" category, click on the "Messaging" tab, then select "Messaging Applications" from the drop-down menu.
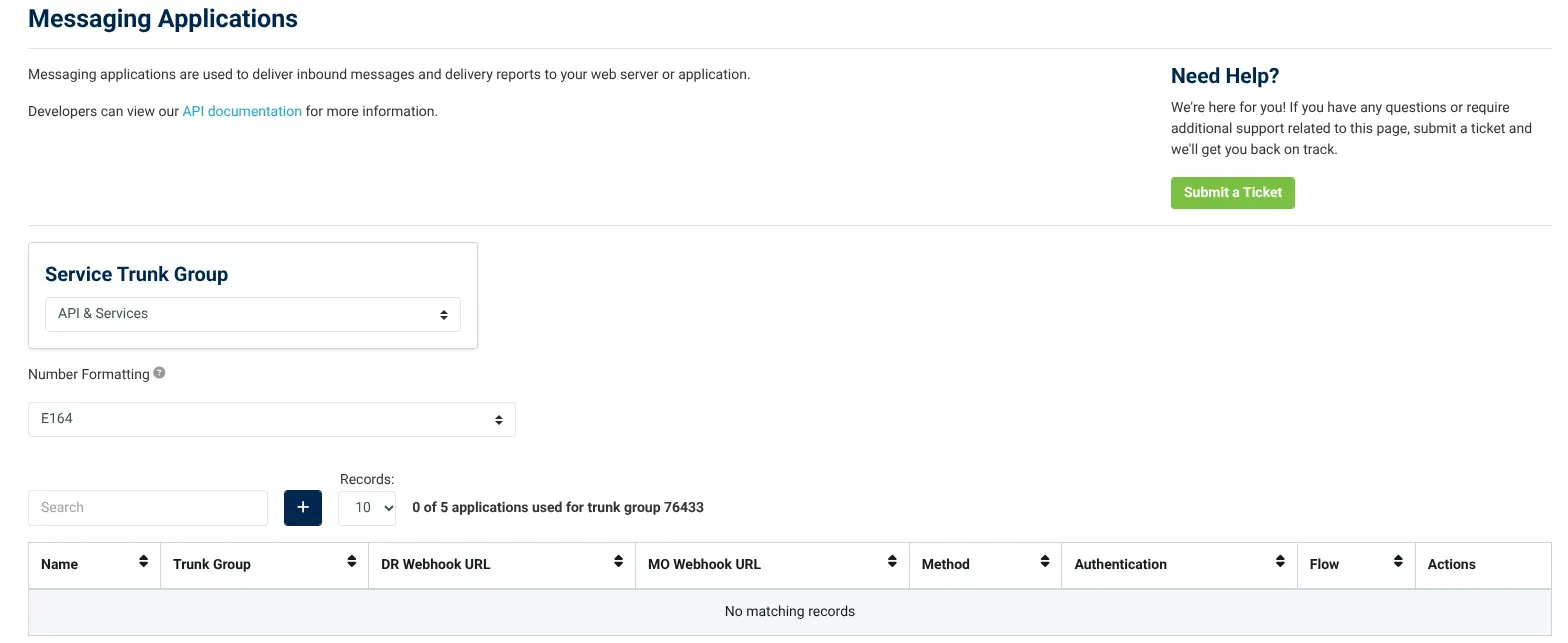
Click on the blue "+" button.

Profile Name: Enter the Name you want for the profile (ex. 3CX SMS).
Trunk Group: Select your service trunk from the drop-down menu.
Action Type: Select “Send HTTP Callback.”

HTTP Method: Select "POST" from the HTTP Method drop-down menu.
Events: Select "Both" from the Events drop-down menu.

MO Webhook: Copy and paste the SMS Webhook from 3CX. See step 5 on copying the SMS Webhook.
DR Webhook: Same as the MO Webhook.
Authentication: Select "None" for this configuration.
Click on "Confirm" when you are finished.
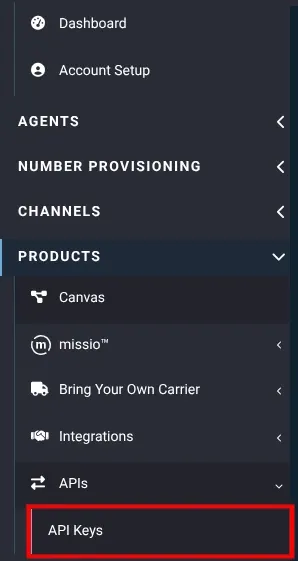
Open the "Products" category, click on the "APIs" tab, then select "API Keys" from the drop-down menu.
Click on the "Create Key" button.

Enabled: Check this box to enable this API key.
Name: Enter "3CX SMS" as the API key's name.

Copy the API Key you created.

In 3CX, Paste the API Key in the "API Key" text box.

In the "Number Provisioning" category, click on the "Phone Numbers" tab, then select "Numbers" from the drop-down menu.

Select the pencil icon under actions.

SMS Enabled: Check this box to enable SMS on this phone number.
Service Trunk: Select your service trunk from the drop-down menu.
Messaging Application: Select your messaging application: "3CX SMS" from the drop-down menu.
Campaign: Select your campaign. If you have not created a campaign yet please follow our guide on The Campaign Registry (TCR). You must have a campaign to enable SMS on your numbers.
Click on "Confirm" when you are finished.


