Learning Hub / Tutorials / VitalPBX / Extension SetupFAQs
Tutorials: Extension Setup
Extension Setup
Learn how to set up an extension on VitalPBX to start sending and receiving calls!
Required Access: VitalPBX
Last Updated: 7/14/2025

Enter your username and password.
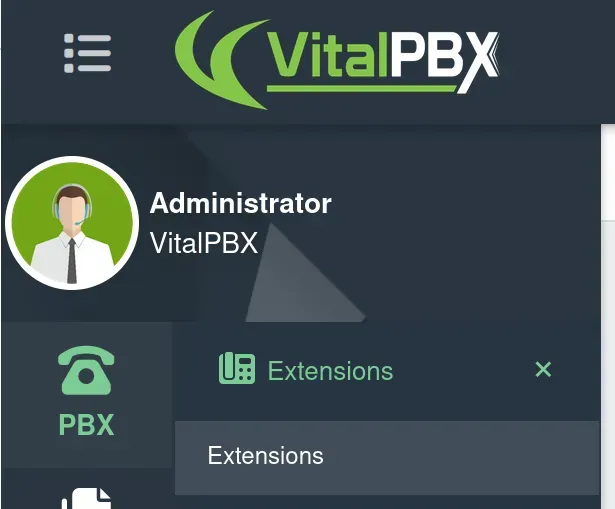
Under the "PBX" tab, select the "Extensions" option, then click on "Extensions" from the drop-down menu.

Enter the Following:
- Extension: Enter the extension number.
- Name: Enter the name of the user.
- Email Addresses: Enter the email address(es) where service messages will be sent.
- Internal CID: CNAM (name) and Caller ID (number) displayed when calling other extensions on this PBX.
- External CID: CNAM (name) and Caller ID (number) displayed when making calls outside of this PBX.
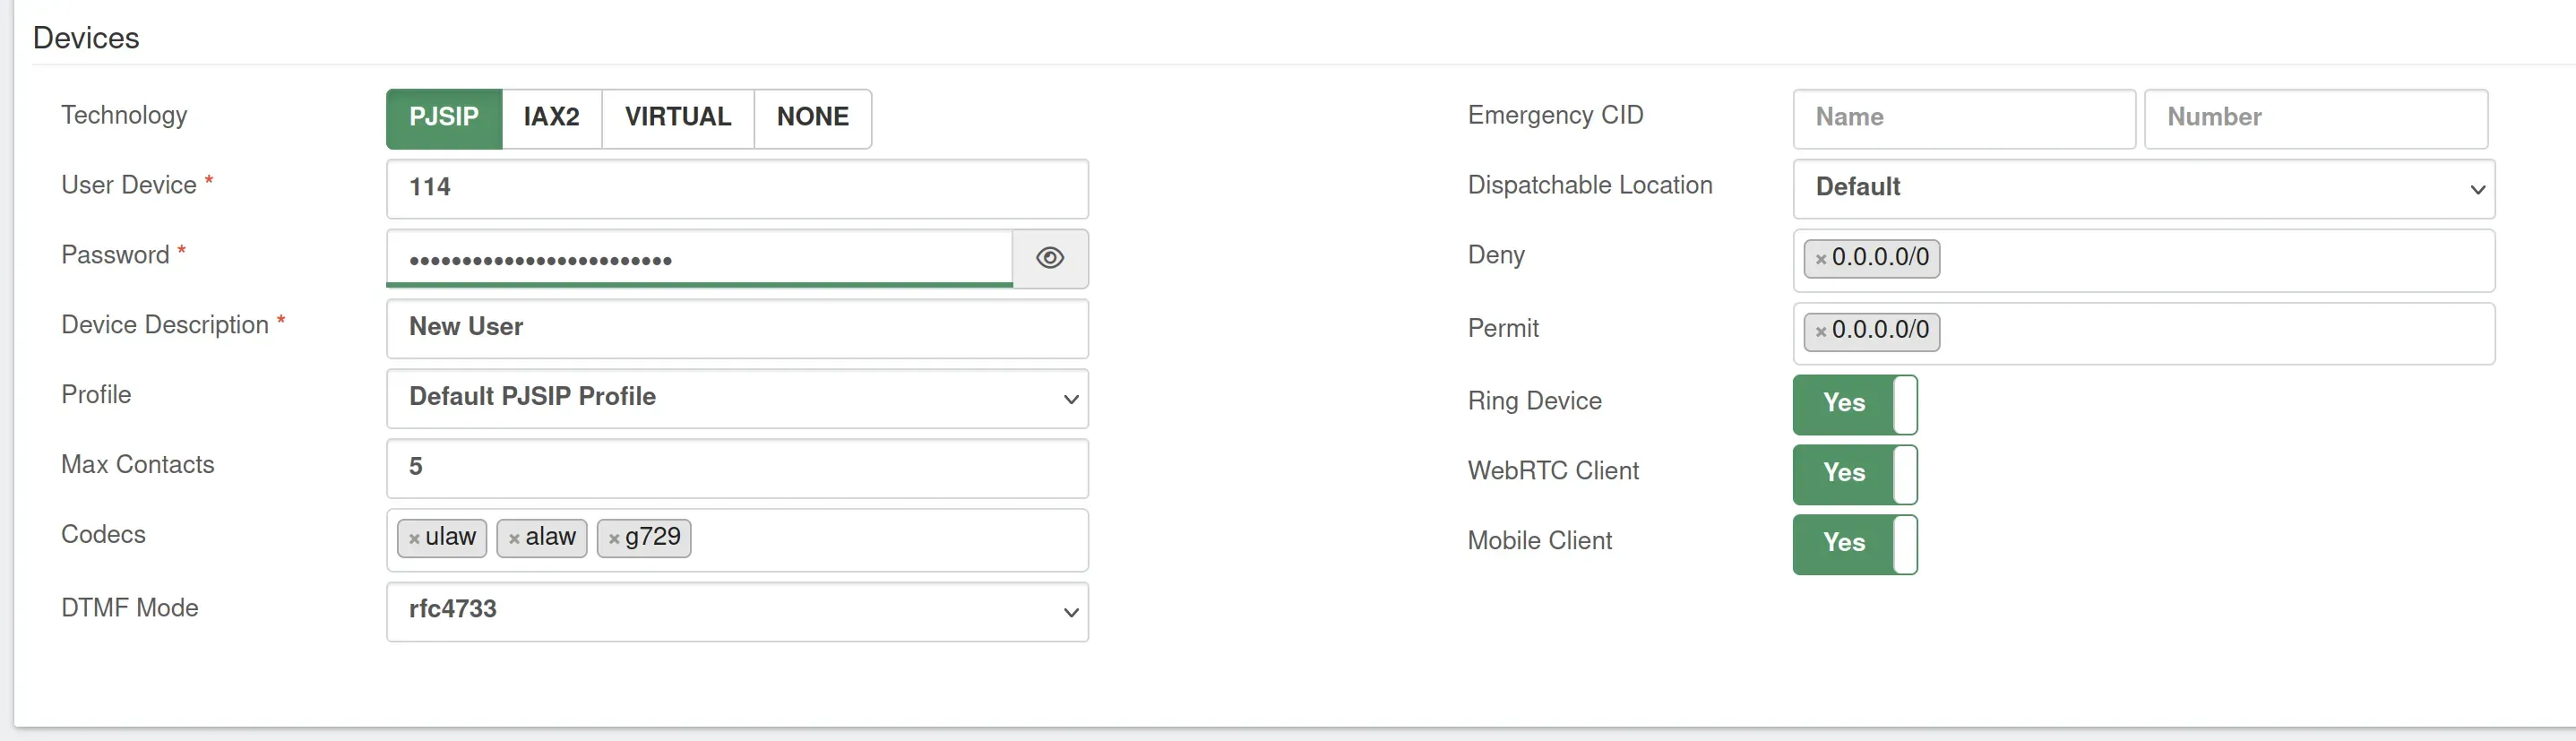
- Codecs: ulaw, alaw, g729
- WebRTC Client: Turn this feature on to enable the WebRTC application.
- Mobile Client: If you turn this feature on, it will allow you to generate a QR code to configure this endpoint with the VitalPBX Connect app.

When you have made all of the necessary changes, click on the "Save" button.

After you save it, reload to finalize your changes.
Learning Hub / Tutorials / VitalPBX / Extension SetupFAQs


