Learning Hub / Tutorials / 3CX / SIP Trunk Setup (V20)FAQs
Tutorials: SIP Trunk Setup (V20)
Learn how to set up a Voxtelesys SIP Trunk in 3CX Version 20!
Required Access: 3CX, Voxtelesys Portal
Last Updated: 2/26/2026

Enter your credentials.

Click on the "Admin" button on the lower left side of the screen.

Select the "Voice & Chat" tab.
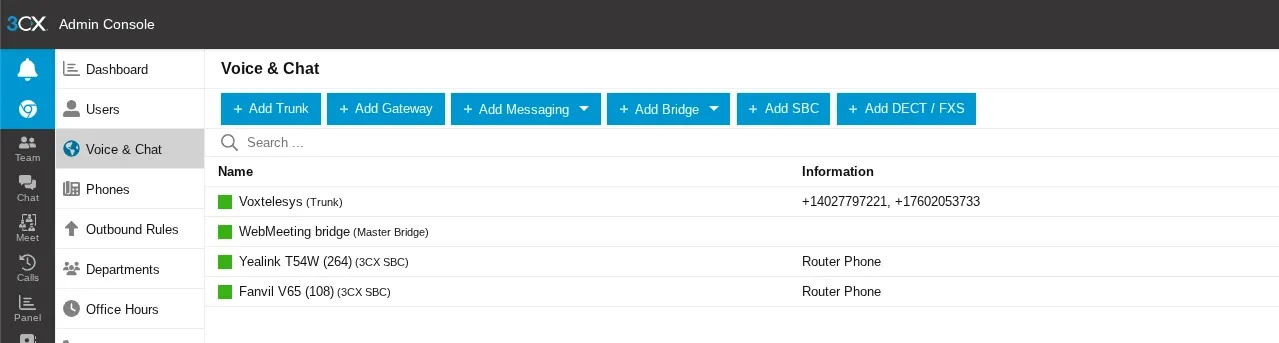
Select the "+ Add Trunk" button.
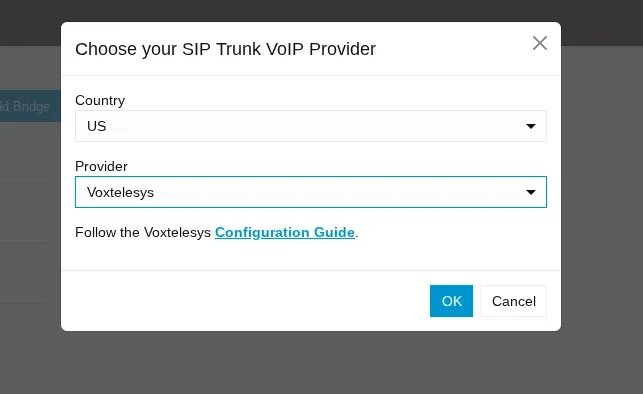
Select "US" as your Country and "Voxtelesys" as your Provider and click "OK".
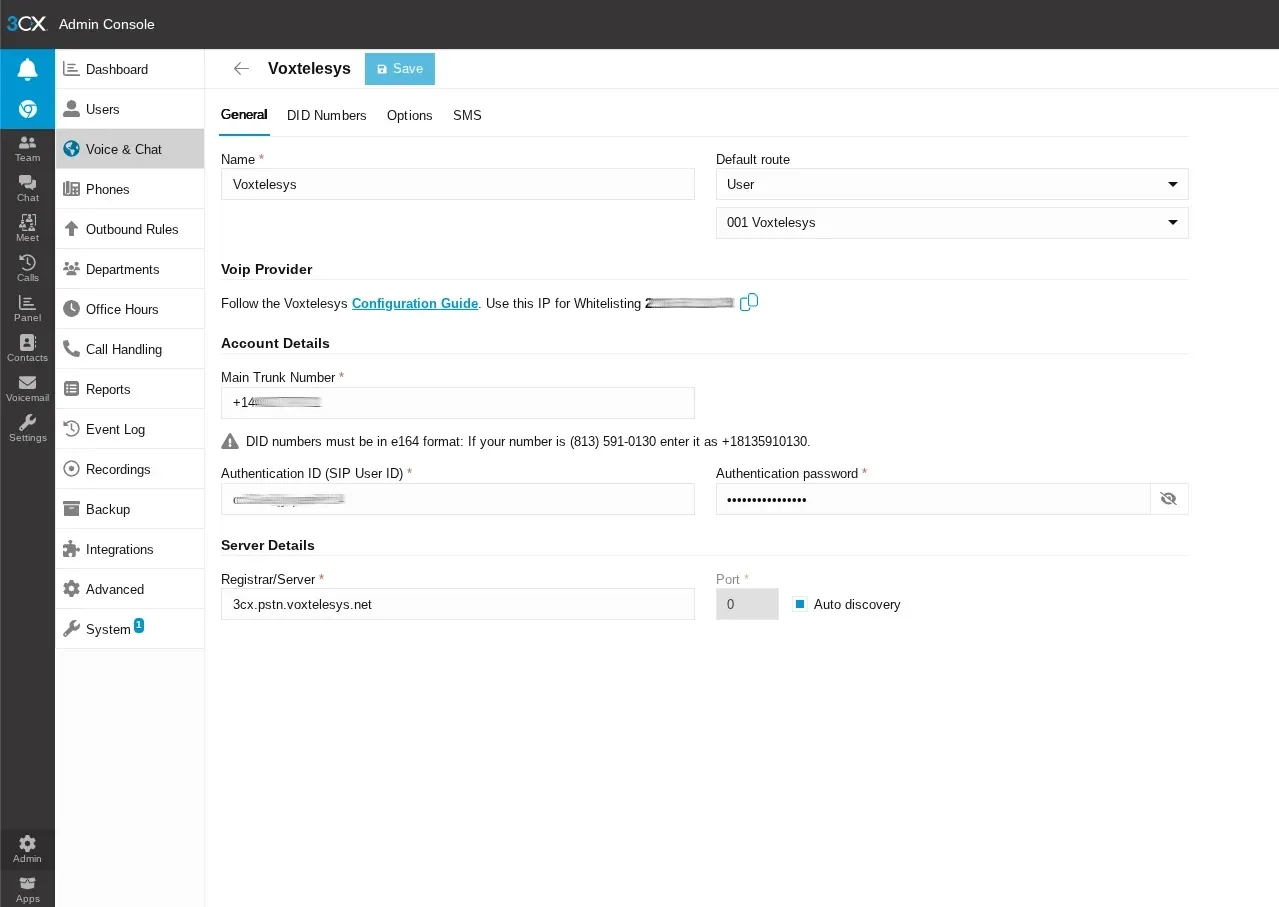
Get the SIP Trunk’s information (retrieve it from the Voxtelesys Portal):
- Name: Choose your name for the trunk
- Main trunk number: Fill in your Voxtelesys number in E164 format.
- Authentication ID (SIP User ID): From Voxtelesys
- Authentication password: From Voxtelesys
- Registrar/Server: Confirm it shows 3cx.pstn.voxtelesys.net
- Auto Discovery: Make sure Auto discovery is checked.

Default Outbound Caller ID:
Set the number in the E164 format as the example shows.

Optional - Add or import additional DID numbers here:

Optional - Check Enable SMS here:

Save and verify that the Voxtelesys SIP Trunk registered.
Learning Hub / Tutorials / 3CX / SIP Trunk Setup (V20)FAQs


