Tutorials: Switch Extension's Status
Required Access: 3CX
You can change your extension’s status from your deskphone with BLF keys, the 3CX Web Client, the 3CX Mobile App, or even the 3CX Management Console.
Table of Contents:
Last Updated: 2/26/2026

Click on the three dot icon from the dashboard and click on "Settings"

Click on the "BLF" tab.

Click on the drop-down menu next to the BLF key and select "Change Status"

From the second drop-down menu, you can change your status to the following:
- Available
- Away
- Do not disturb
- Out of office
- Business Trip

You can view the new BLF keys either on your desk phone or on your web client by going to the "Dialer" button, and hitting the right arrow icon to the left of the "x" button.
Log in to the 3CX Web Client
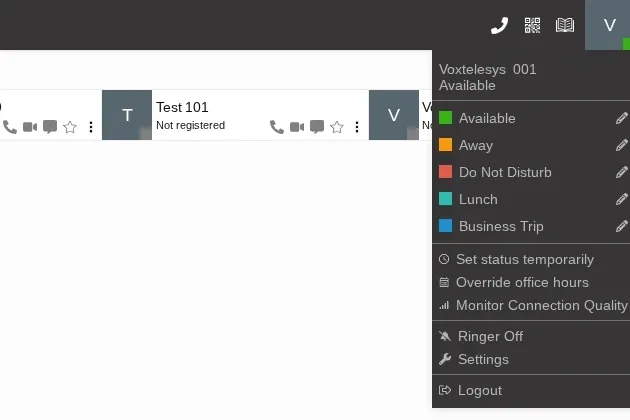
Click on the user icon in the upper right corner of the web client.
From the 3CX Web Client, you can change your status to the following:
- Available
- Away
- Do not disturb
- Out of office
- Business Trip
You could also click on "Set Status Temporarily" from here.
Click on the three dot icon from the dashboard and click on "Settings"
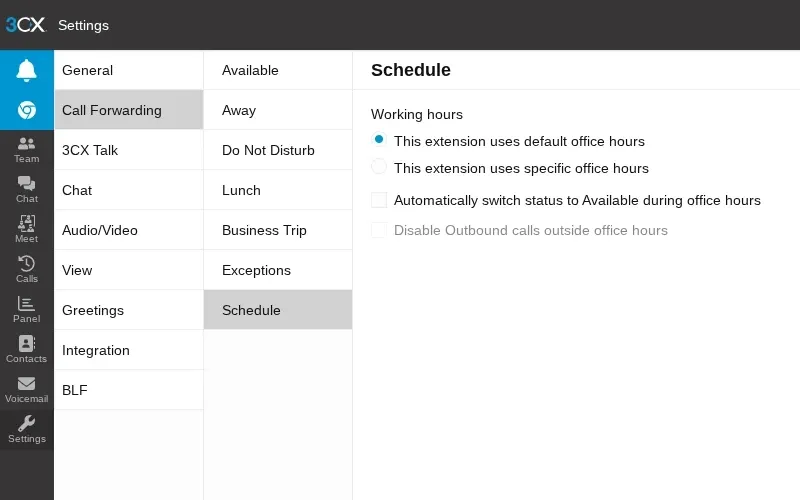
Click on the "Call Forwarding" tab, then click on "Schedule".
From here, you could check the option to "Automatically switch status to Available during office hours".

You could optionally change your extension to use specific office hours.

You can disable outbound calls outside office hours.

Download and open the 3CX Mobile App.

Then click on the green icon in the top right corner to change the status.

You could choose the status from the list below or set a temporary status.

For example, you could switch it to "Away" here:

If you choose to set a temporary status, you will configure the following:
- Change status to: Choose from the available statuses.
- For: Set the length of time.
- Set Status Message: Type a custom message.
You can also set other users status via the 3CX Admin Console. (They must have less system permissions than you)
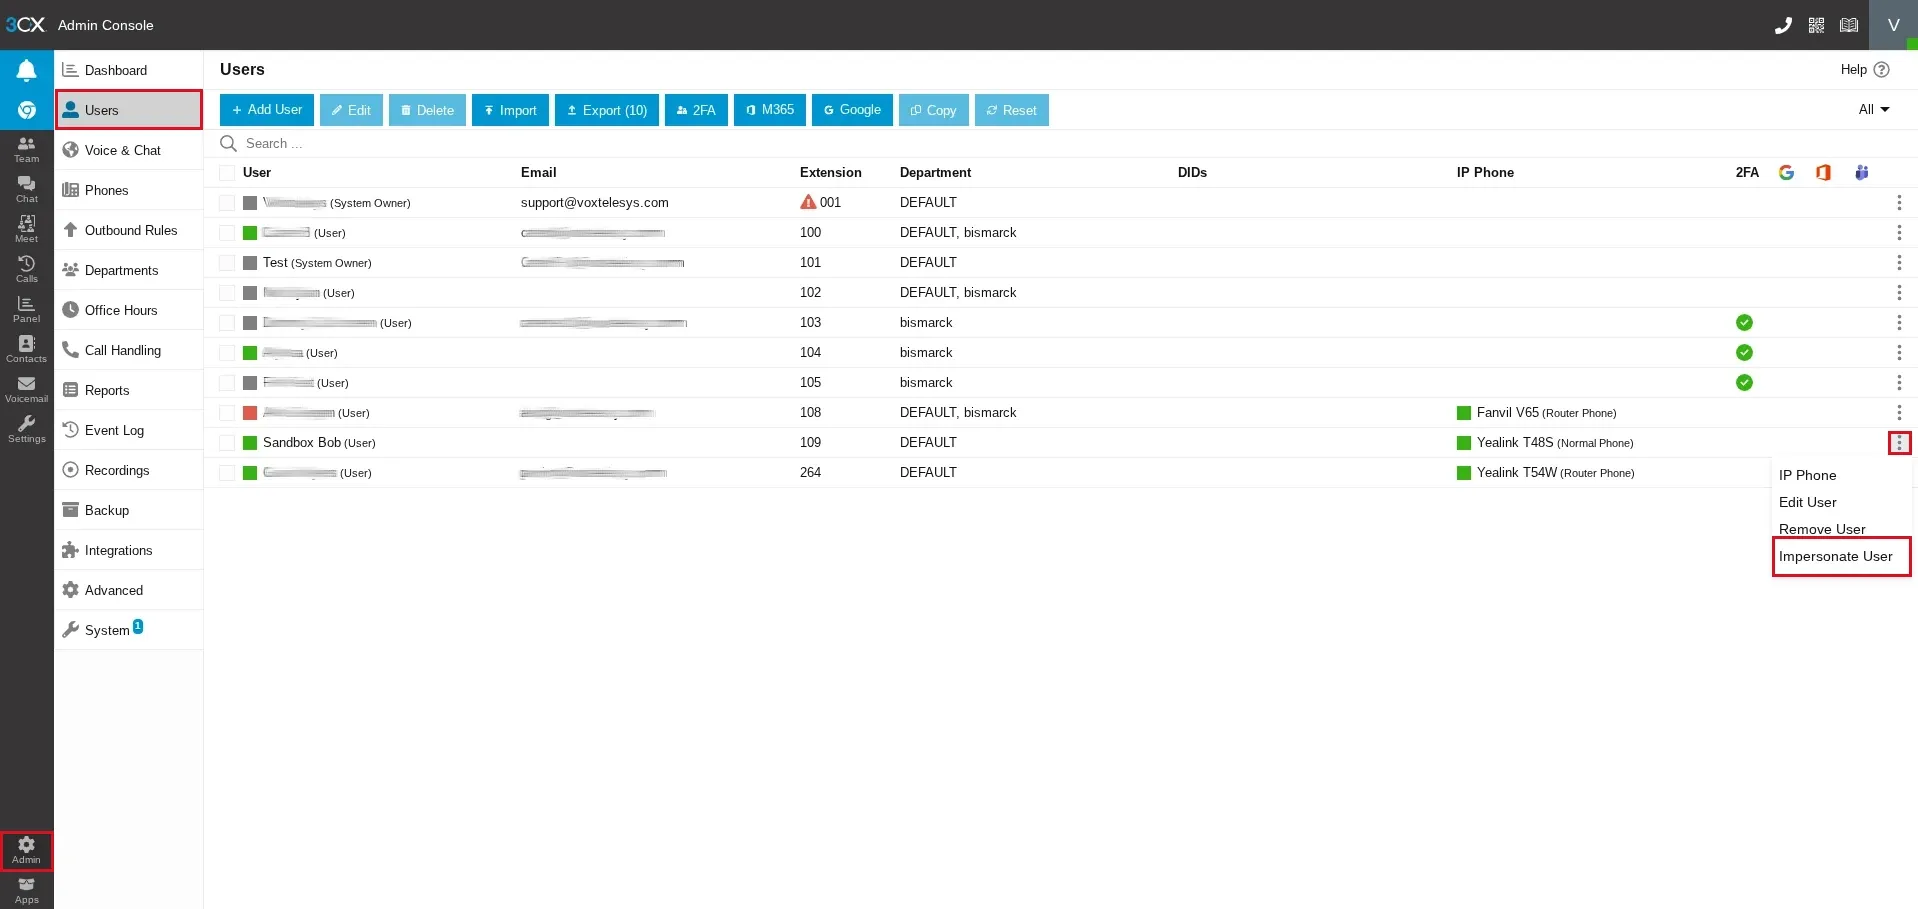
1.) From the 3CX Admin Console, click on the "Users" tab.
2.) Then, click on the three dots on the right hand side of the desired user.
3.) Next, click the "Impersonate User" button.
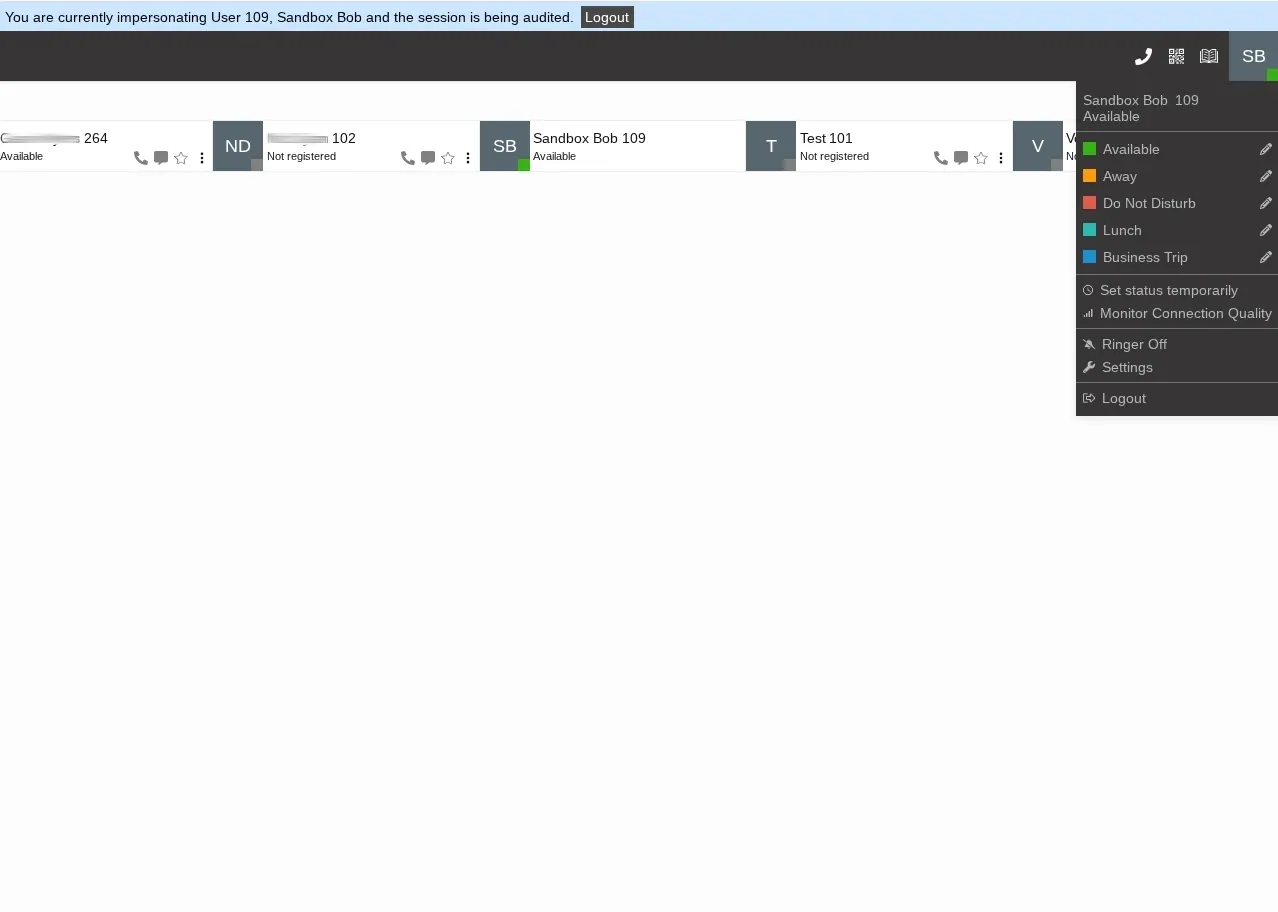
Once you are impersonating that user, click their user icon in the top right corner of the web client and set them to the desired status.


