Learning Hub / Tutorials / 3CX SMB / 3CX FREE SetupFAQs
Tutorials: 3CX FREE Setup
3CX FREE Setup
Learn how to create a 3CX FREE instance! Keywords: 3CX, FREE, Sign up, Log in, Additional Configuration
Table of Contents:
- 3CX FREE Webpage
- Sign up
- Verfy with Email
- Account Details
- Choose your 3CX
- Log in to 3CX Free
- Additional Configurations
Last Updated: 5/22/2025


Sign up with Google or with your email address.

In our example, we will sign up with an email address.

A message informing you to check your email for a verification code will appear.
Navigate to your email to verify.

Fill in the following information:
- First Name: Autofilled
- Last Name: Autofilled
- Company: Your company's name
- Language: Autofilled
- Country: Autofilled
- Region/State: Your Region/State
- Account Password: Enter your desired password used for Customer Portal and System Access
- License Agreement: Checked
Click on "Next" when you are finished.
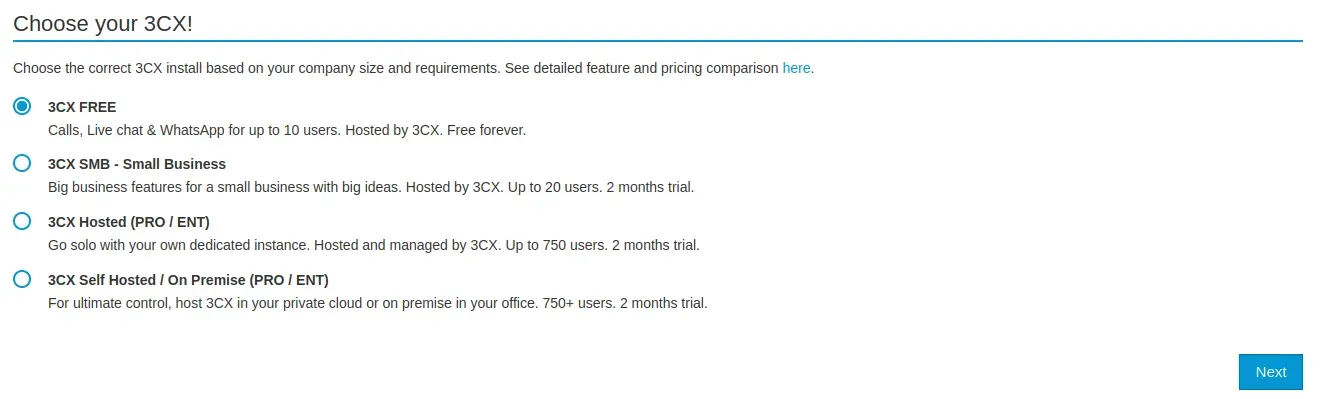
Select "3CX FREE"
Click on "Next"

Log in to 3CX FREE with the login information provided.
Additional Configurations include:

Navigate to 3CX Admin
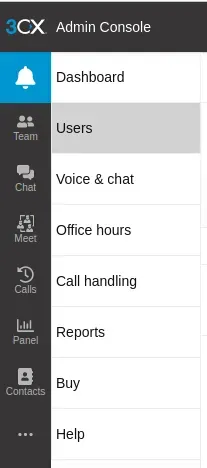
Click on the "Users" tab.

Click on the "+ Add user" button.

Enter the following information:
- First Name: Enter the user's first name.
- Last Name: Enter the user's last name.
- Email: Enter the user's email address.
- Mobile: Enter the user's cell phone number.
- Role: Set the user's role.
- Outbound Caller ID: Set the Outbound Caller ID.
- Assigned DID number(s): Assign the DID number or numbers.

Example of new user being added:

Click on the "Voice & chat" tab to set up Live Chat.

Download the 3CX app on your iOS or Android device.
Learning Hub / Tutorials / 3CX SMB / 3CX FREE SetupFAQs


